

Interactive lesson Gr7 + 8

Presentation
•
Computers
•
6th - 8th Grade
•
Practice Problem
•
Easy

why you black me Mouawad
Used 19+ times
FREE Resource
10 Slides • 11 Questions
1
By Dania Mouawad
2
Computer Practical Topics:
Unit: Arduino.
Lesson: Programming Blinking LED in Arduino IDE
(Connect - Verify - Upload )
Resource:PDF/Video
3
Multiple Choice
What are the main components that we used in Blinking LED circuit ?
LED
Buzzer
Ultrasonic sensor
Light sensor
4
Multiple Choice
What is the name of program we used to simulate the LED blinking circuit
TinkerCad
Word
Canva
Exel
5
Multiple Choice
Why we use the resistor in the Blinking LED cirduit ?
used to quickly connect components
to limit currents.
In the circuit
a matrix of holes connected to each other to create electronic circuits.
6


Use red, yellow, and green lights to control traffic flow at intersections,
Traffic lights
Indicator is to indicate what turn you are planning to take
car indicators
a vehicle used by emergency services, like police cars, fire trucks, and ambulances, to respond to calls for service.
emergency vehicles
7
Objective:
•Connecting the physical components.Explain what the Arduino IDE is and why we use it.
•Identify the main parts of the Arduino IDE interface.
•Write, verify, and upload a simple sketch to the Arduino board.
•Understand the workflow: Write → Verify → Upload → Monitor.
8


9
Arduino IDE
Arduino IDE (Integrated Development Environment) is the official software used to write, edit, and upload code to Arduino boards.

10
Once the Arduino IDE is installed, the interface is easy to use:

11
Every Arduino sketch (program) has two main parts:


12

13
💻 Sample Arduino Code:
void setup() {
pinMode(13,OUTPUT);
}
void loop() {
digitalWrite(13,HIGH);
delay(1000);
digitalWrite(13,LOW);
delay(1000);
}

"A" Write the command in void setup
"B" Check.
"A" Write the command in void loop.
"B" Check.
Switch and repeat.
14
Multiple Choice
What is the function of the digitalWrite() command in Arduino programming?
Read analog sensor values
Set a pin HIGH or LOW
Print text on the serial monitor
Create delays in the program
15
Multiple Choice
What does the delay() function do in Arduino programming?
Turn off the LED
Set the pin to OUTPUT mode
Control the speed of the LED blink
Change the color of the LED
16
Multiple Choice
17
Multiple Choice
18
Multiple Choice
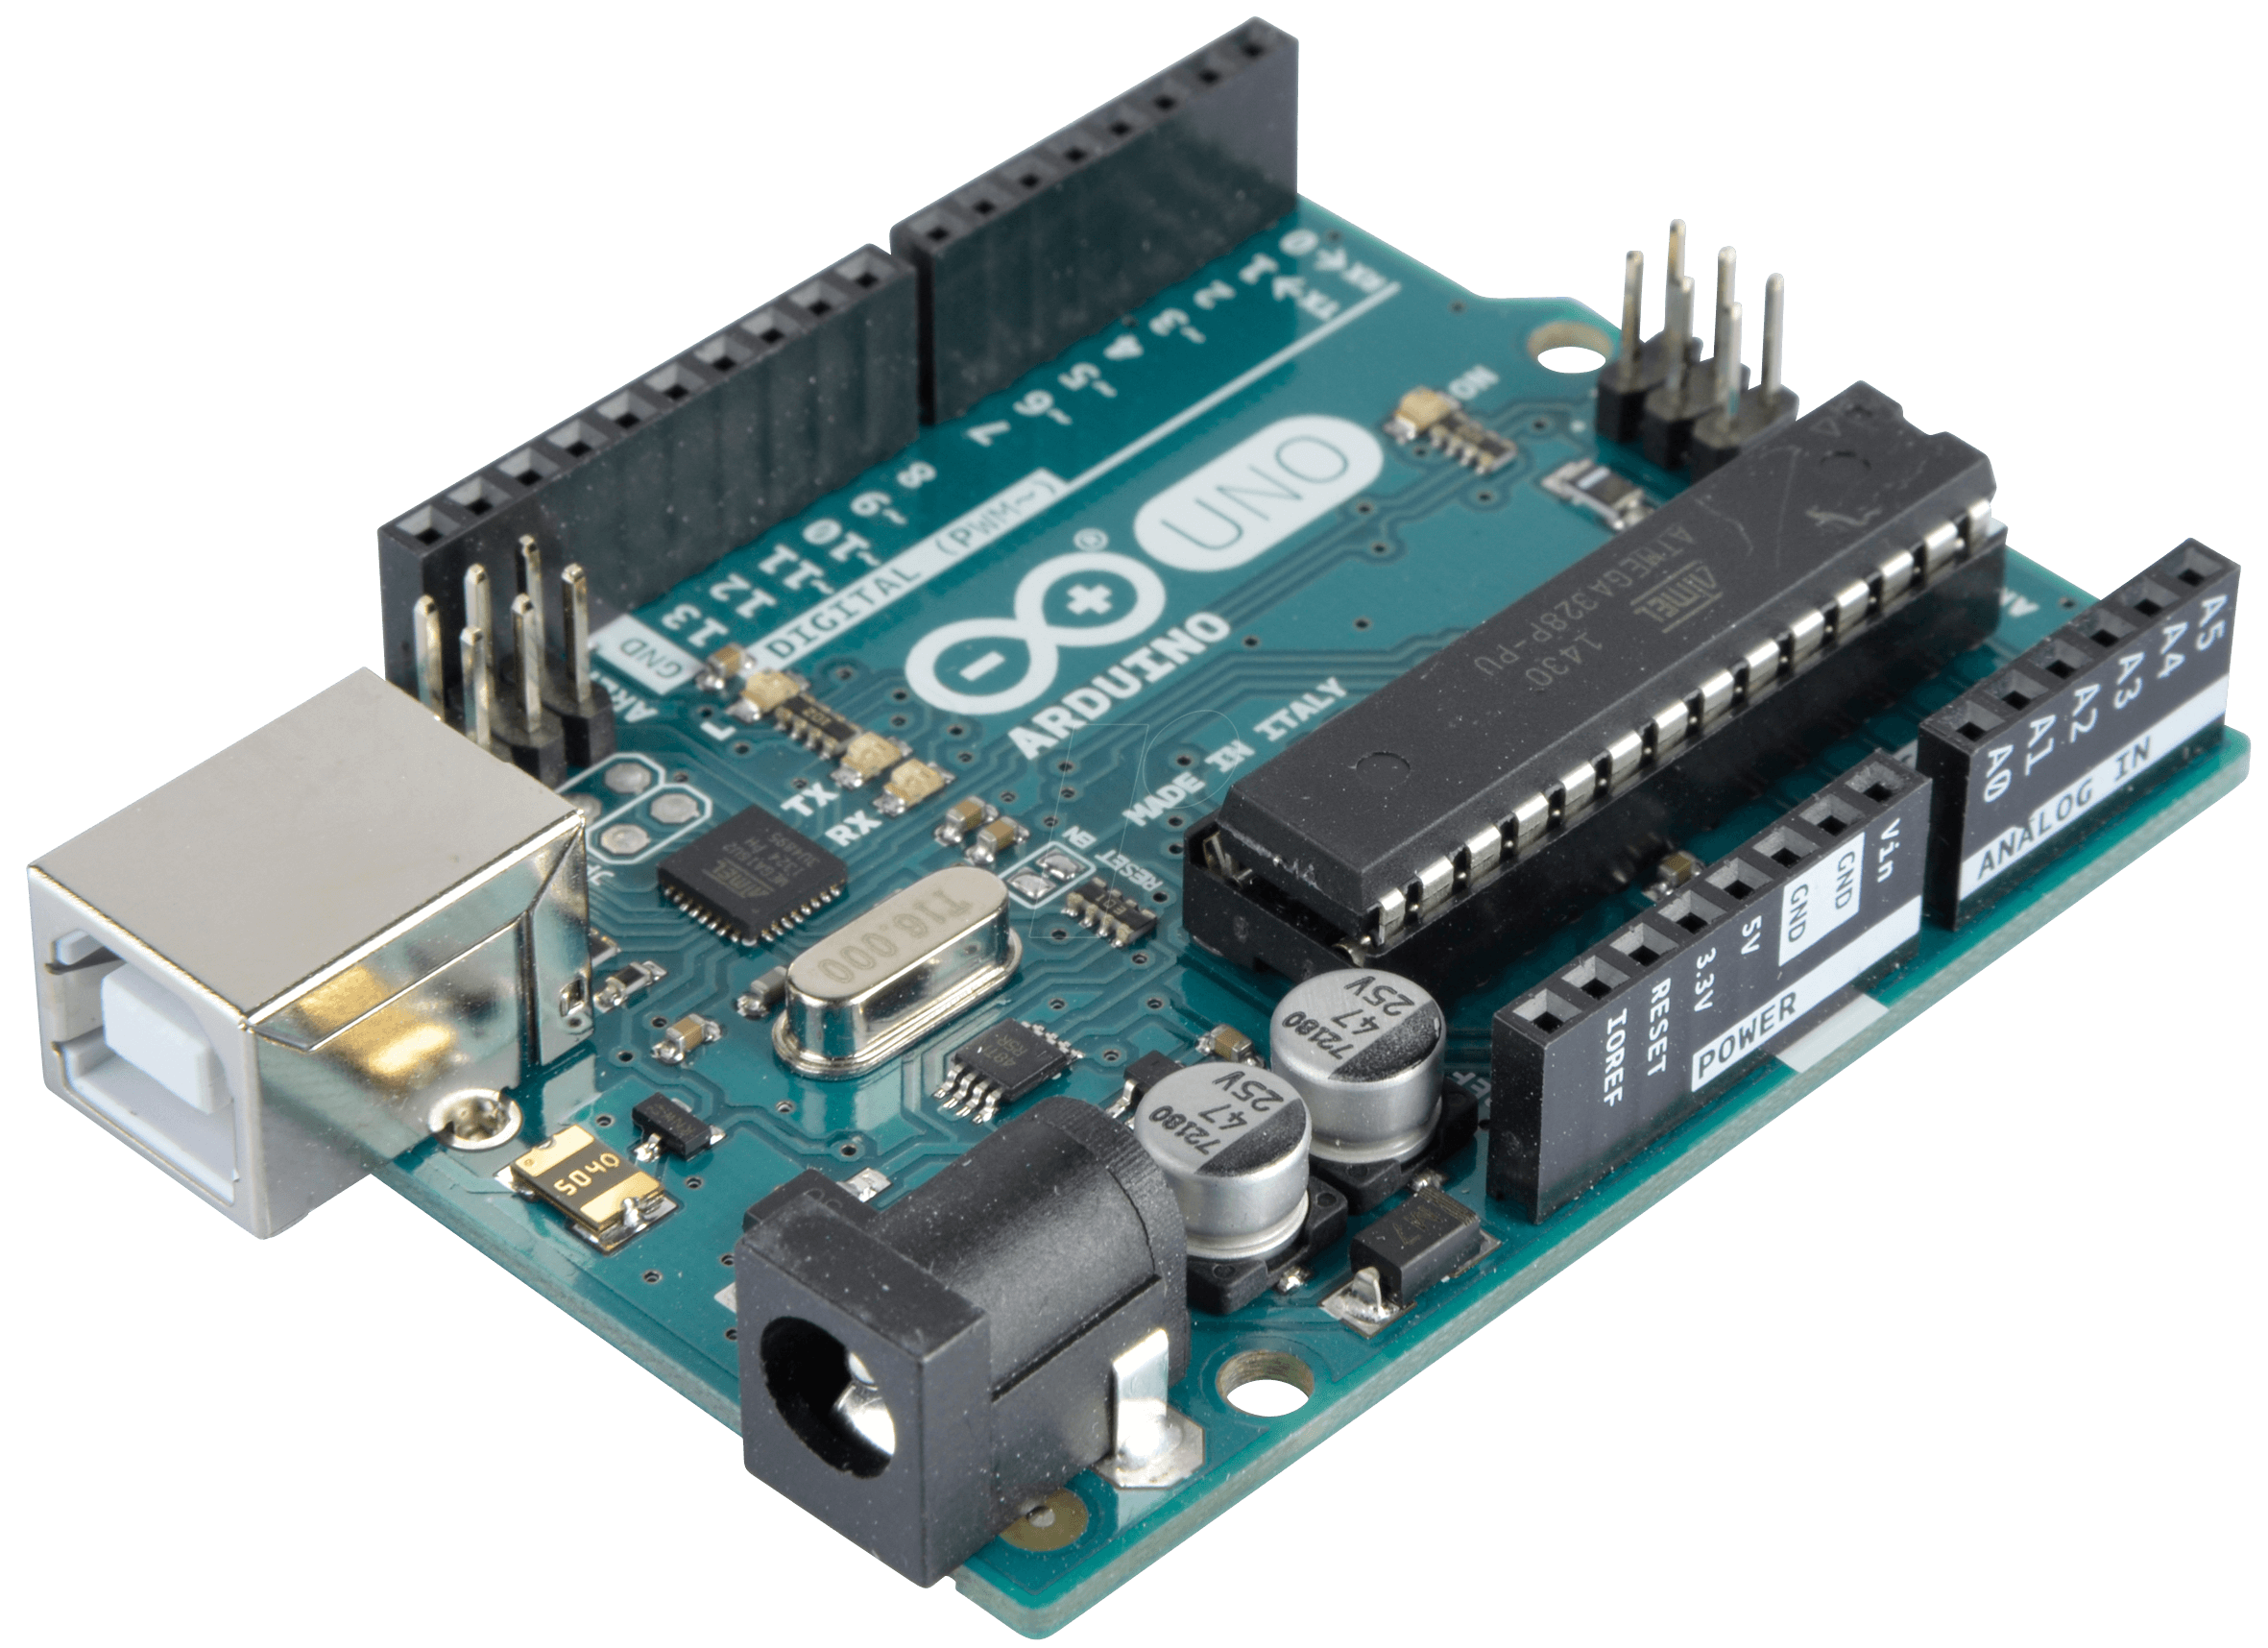
what is the name of this chip
Break
Twix
Embedded
Arduino
19
Open Ended
"By understanding the basic concept of Arduino, its uses, and how it works, how can we apply what we've learned to our real lives and use what's called the Internet of Things?"
20
Open Ended
💬 Reflection Question to End the Lesson:
Now that you’ve learned to make an LED blink, how could you use this skill to create something useful or fun in real life?
21
Poll
⭐ Rate Your Learning (1–5)
⭐⭐⭐⭐⭐
I completely understood and I can teach it to a friend!
⭐⭐⭐⭐
I understood most parts
⭐⭐⭐
I understood some, but I need more practice.
⭐⭐
I need more help.
⭐
I felt lost today.
By Dania Mouawad
Show answer
Auto Play
Slide 1 / 21
SLIDE
Similar Resources on Wayground

16 questions
Order of Operations
Presentation
•
6th - 8th Grade
16 questions
Long Division with Decimals
Presentation
•
6th - 8th Grade
16 questions
The Scientific Method
Presentation
•
6th - 8th Grade
16 questions
Consecutive Integers
Presentation
•
6th - 8th Grade
16 questions
Python Programming Homework 1
Presentation
•
6th - 9th Grade
18 questions
Input and Output Systems
Presentation
•
7th Grade
15 questions
Y1 ICT Topic: Inserting Online Pictures in the Spreadsheet
Presentation
•
KG
16 questions
Counting Atoms
Presentation
•
6th - 8th Grade
Popular Resources on Wayground
10 questions
Safety Day 2026 – Student Review

Quiz
•
9th Grade
21 questions
Continents and Oceans
Quiz
•
6th Grade
20 questions
Parts of Speech
Quiz
•
5th Grade
16 questions
Subject & Predicate
Quiz
•
5th Grade
25 questions
Multiplication Facts
Quiz
•
5th Grade
12 questions
Map Skills
Quiz
•
3rd Grade
22 questions
Continents and Oceans
Quiz
•
5th Grade
15 questions
Rounding Decimals
Quiz
•
5th Grade