
 Worksheets
4b) Beginning: Photoshop Review [WKS 25-35] [5/18/25]
Total questions: 35
Worksheet time: 19mins

When retouching or doing a restoration project, why would you keep making a copy of your current layer and then work on that copy of the layer?
You do this so you can work as non-destructively as possible. Splitting up your work on different layers, allows you to delete a layer and not lose all of your work.
You would do this so that you can work destructively. By working destructively, you are able to go back if you mess up.
You would do this because when you are removing acne, you have to have multiple layers for the clone stamp and patch tools to work correctly.
This workflow allows you to use tools that you otherwise couldn't, if you only had 1 layer.

When you placed the fur image over the girl, what did you need to do to the fur layer, in order for the skin to properly show through?
Change the blending mode.
Change the opacity.
Make a copy of the fur layer and invert it.
Drag the layer of the girl over the fur layer and then merge them.

If you want to mask something so it "goes away" or "hides"...
should you make your selection before or after you add the mask?
You should make your selection BEFORE you add the mask.
You should make your selection AFTER you add the mask.

When you were working on your "Multiple Exposure" project, what were 2 important things to do during the photographing process, that would make the Photoshop portion easier?
Use a tripod so all of the photos were in the exact same position.
Try not to overlap each pose/photo, so masking was easier.
Make sure that the person you were photographing moved at the exact time you took the photo.
Make sure the shutter speed was fast enough to capture their motion.

What are 3 reasons that you would use a gradient?
As a graphic design element, to add color and interest.
As a filter, over a photo.
As a layer mask, to transition from visible to invisible.
To help clone a part of a photo and place it on another part.

When you create a block letter using the Polygonal Lasso Tool, how do you remove the inside (for example the 2 holes in the letter B)?
You need to hold "OPTION" to remove a section that will create a negative space.
You need to hold "SHIFT" to remove a section that will create a negative space.
You need to hold "COMMAND" to remove a section that will create a negative space.
You need to hold "CONTROL" to remove a section that will create a negative space.

What does this window in Photoshop allow you to do?
Change your text
Change your layers
Change your blending mode
Change your channels

How do you reactivate your text layer, so you can change it again?
You double click the "T" icon on the thumbnail.
You click "Command + T" on your keyboard.
You hold down "CTRL" and tap the text layer.
You go to the "Move Tool" and then click the text.

What icon/button will allow you add a drop shadow, stroke, bevel and emboss, etc?


After you make a new document in Photoshop, what are 2 ways to confirm that your document size is correct and the size you were hoping for?
Look in the bottom left corner
Go to Image > Image Size
Click File > Document Size
Look in the tab of the file

If you are struggling to find a tool in Photoshop, what 2 ways can help you find a tool?
Command + F
Click the magnify glass in the top right
Click the 3 dots on the toolbar and search for the tool
Click File then look for the tool.

What does this icon/button allow you to do?
It allows you to group your layers into folders.
It allows you to open a new file from a folder on your computer.
It allows you to layer mask a layer.
It allows you to combine 2 projects into 1.
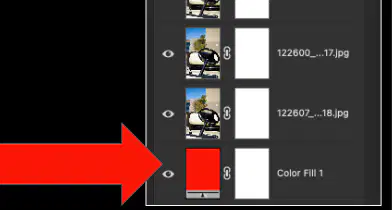
When we added a red layer to the bottom of the Focus Stacking project, what adjustment layer did we add?
Solid Color Adjustment Layer
Gradient Adjustment Layer
Color Balance
Adjustment Layer
Hue/Saturation
Adjustment Layer

How do you default your toolbar colors to Black & White?
Click "D" (for default) on your keyboard
Click "C" (for color) on your keyboard
Click "Command + D"
Click "Command + C"

What is a Hex Code?
A hex code is a string of characters for a specific color.
A hex code is a a string of numbers that are used to determine your document size.
A hex code is a type of adjustment layer that helps change the color of a layer.
A hex code is how you describe the hue/saturation of a photo.

How do you put teal guidelines on your document to help you with alignment and centering?
Click inside of the rulers and pull them out.
Click "T" on your keyboard for Teal Guidelines.
Click "R" for Rulers and then they will pop up.
Click the grey space around your document and pull a ruler out.
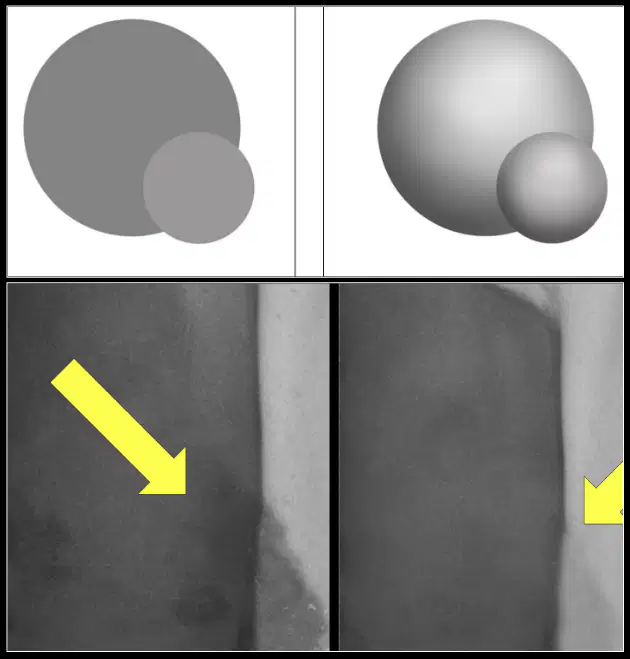
What 2 new tools were used when we were working on the restoration project? We also used them to make a flat gray circle into a 3D sphere by adding highlights and shadows.
The Dodge & Burn Tools
The Lighten & Darken Tools
The Contrast & Brightness Tool
The Smudge & Blur Tool

When you convert a editable shape or text layer to a photo layer is called, you are doing what to the layer?
Rasterizing
Reversing
Resizing
Rhinocerizing

This is when you place one layer above another layer and make the top layer GO INTO the shape of the lower layer.
What is this technique called?
Clipping Mask
Layer Mask
Cropping Mask
Editing Mask
.OTF and .TTF are what kind of files?
Fonts
Photos
RAW Files
Photoshop Brushes

After you download a font, how do you install it on your computer (in order to use it in Photoshop)?
You double click the file and then click "install font".
You drag the .OTF file into Photoshop.
You open Photoshop and then go to File > Install Font.
You go to the Horizontal Type Tool and choose the font you want.
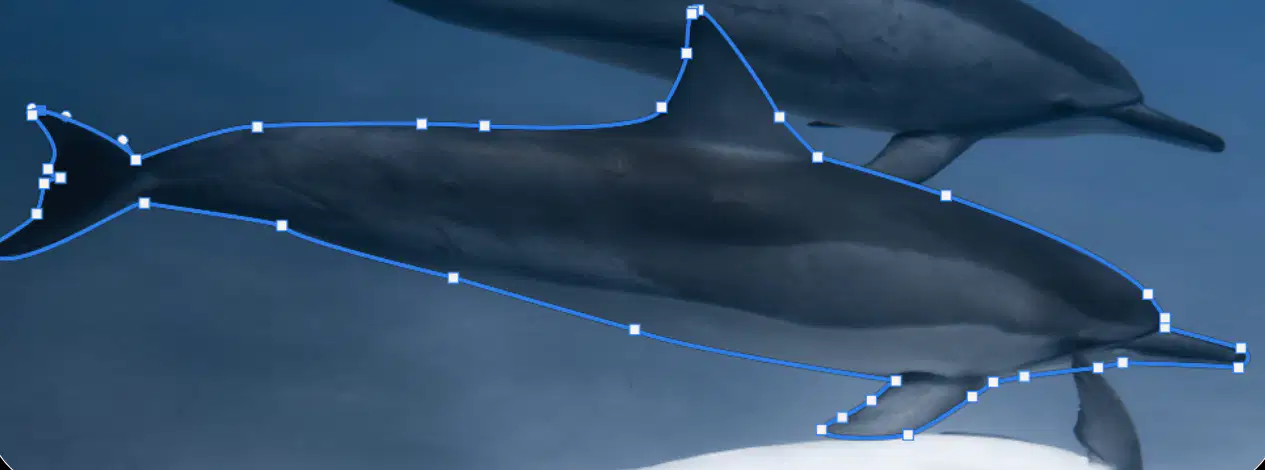
When we were working on this project, how & why did we use the pen tool?
We used the pen tool to create a path around a shape then converted it to a selection to remove it from the background.
We used the pen tool to practice our ability to make straight lines and then used that to alter the shape of the dolphin.
We created the anchor points by using the pen tool, in order to select and mask the dolphin.
After creating a path around the dolphin, we used that path in order to duplicate the dolphin.
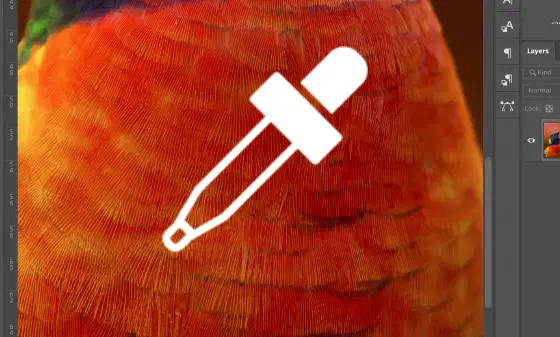
What are you doing when you are using this tool?
You are using it to sample an existing color on your document in order to use that color to paint for example.
You are using the tool to make a selection in order to select and mask your layer.
You are using the tool to add a color to your file.
You are using the tool to adjust the saturation of your layer.
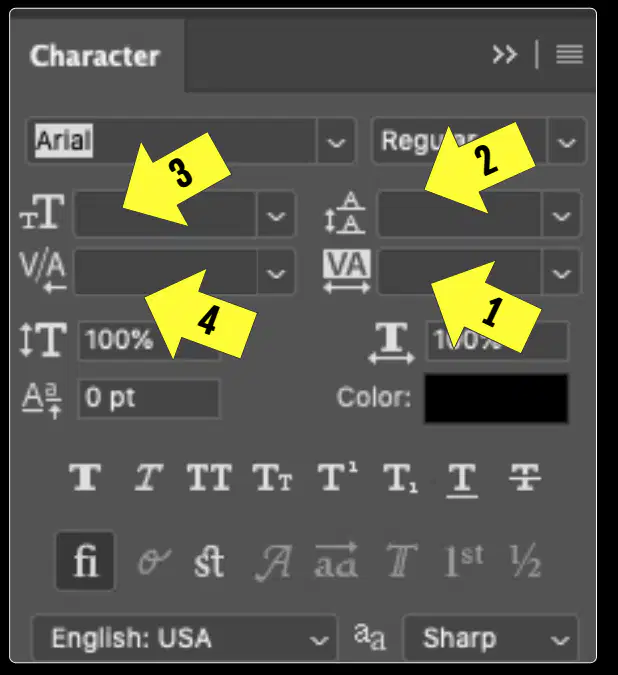
When adding text into a project in Photoshop, where do you go to adjust the spacing [aka tracking] between each letter?
1
2
3
4
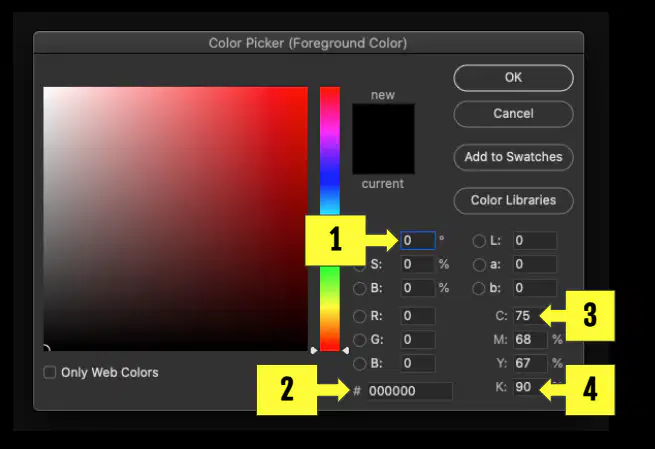
When you need to use a specific color in your project, where do you enter the HEX code?
2
1
4
3
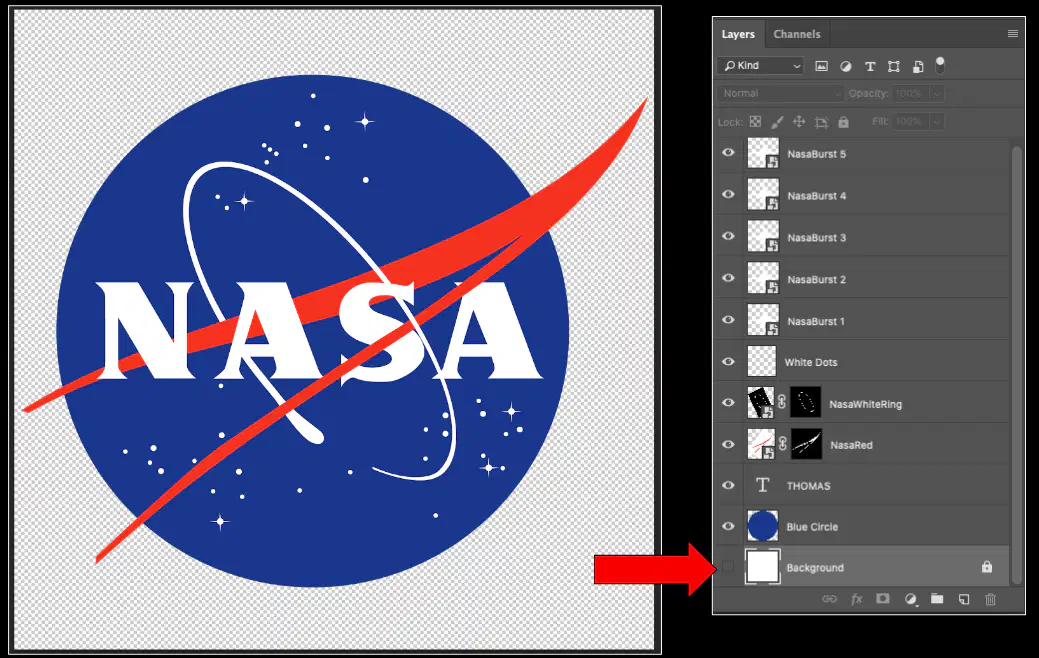
When we worked on the NASA logo recreation project, we did we save the file as a PNG and not a JPEG?
Because we needed the background to be transparent and PNG preserves that.
Because if we would've saved it as a JPEG then Photoshop would've added in the white background again.
Because a PNG is the file format used for logos.
Because anytime you are dealing with a project that does NOT involve photography, you must save it as a PNG.
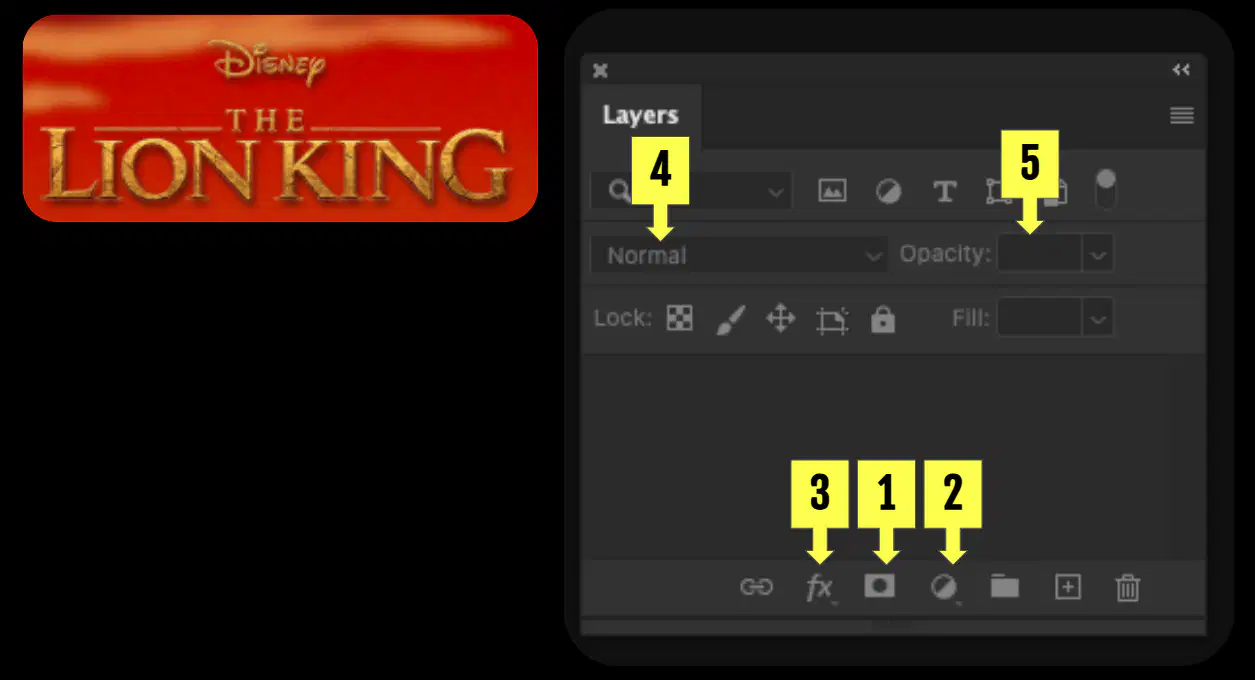
After we removed the background from the title and placed it, we needed to add a drop shadow and a bevel and emboss effect. Where do you go to do that?
3
1
2
4
5
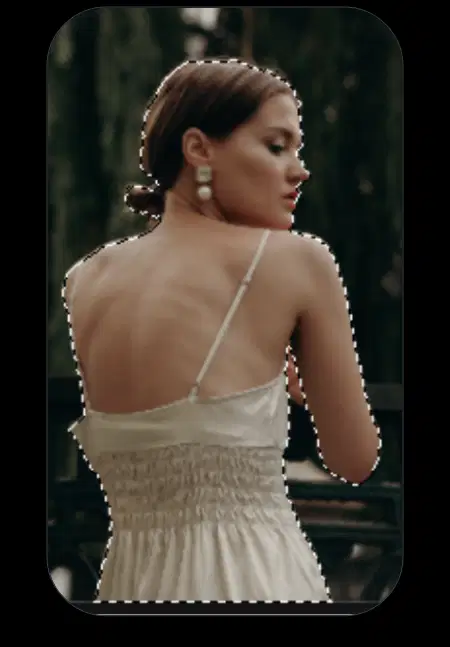
After using a selection tool to make a selection of an object or subject, before moving on to the next step, it is best to clean up your selection. You can do this by clicking what button?
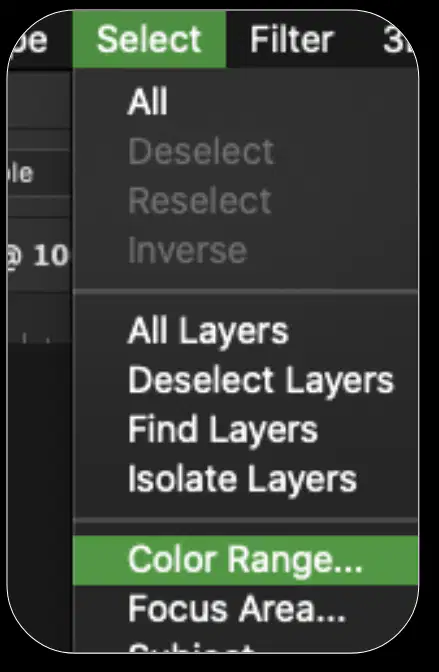
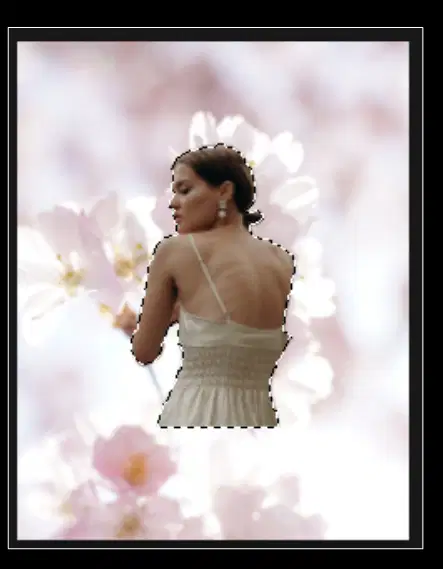
In order to apply an adjustment layer [i.e. black & white or color balance] to a specific layer within a project, what shortcut can we use in order to put ants around the area we want to adjust?
Hold Command and then click the thumbnail of that layer.
Hold Option and then click the layer name.
Hold Shift and then click the eyeball of that layer.
Hold Command + Shift and then click the thumbnail of that layer.
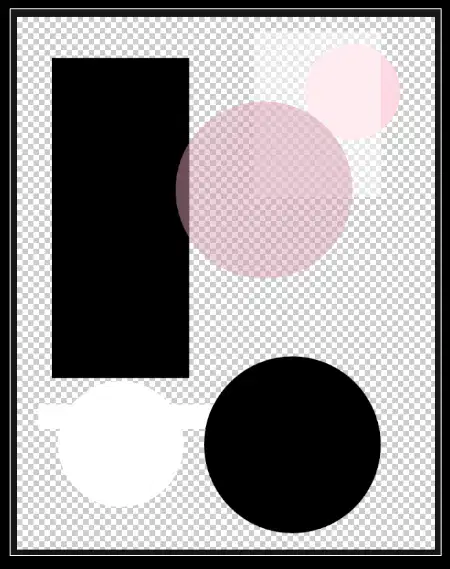
What 2 new tools were introduced in the Flower Girl project? These tools allowed us to create shapes in our design, so we could clip images into them.
Rectangle Tool
Ellipse Tool
Elliptical Marquee Tool
Rectangular Marquee Tool
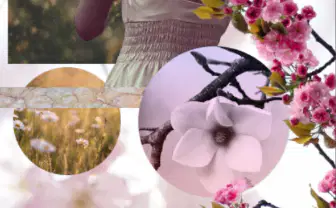
What adjustment layer did we add in order to get the white flower a pink and purple tone?
We added a color balance adjustment layer
We added a gradient adjustment layer
We added a hue adjustment layer
We added a saturation adjustment layer
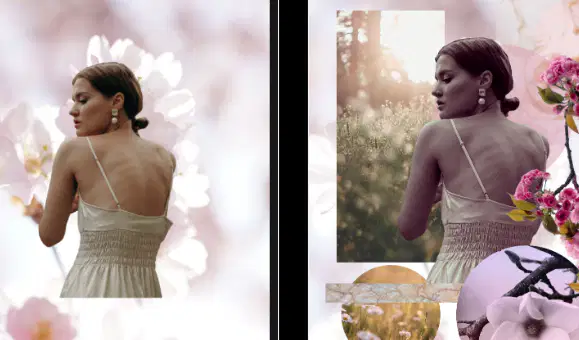
When we were converting the girls skin from color to black & white and then to a pink tone, we had to add a color balance adjustment layer and then adjust the colors in what 3 tone ranges?
Shadows
Midtones
Highlights
Contrast
Brightness

How do you blur a layer?
Filter > Blur
Edit > Blur
File > Blur
Image > Blur
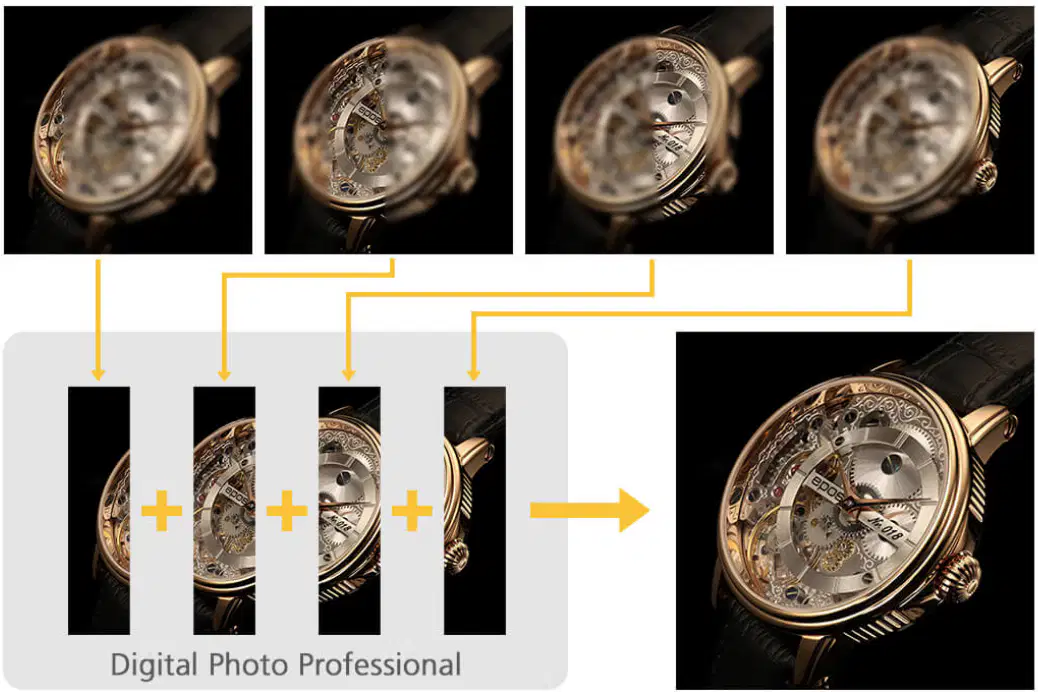
After taking images at different focal points, we used Photoshop to create a focus stack by doing what method?
Layer Masking
Select & Masking
Dodge & Burning
Patch, Heal, Clone
Layer Blurring
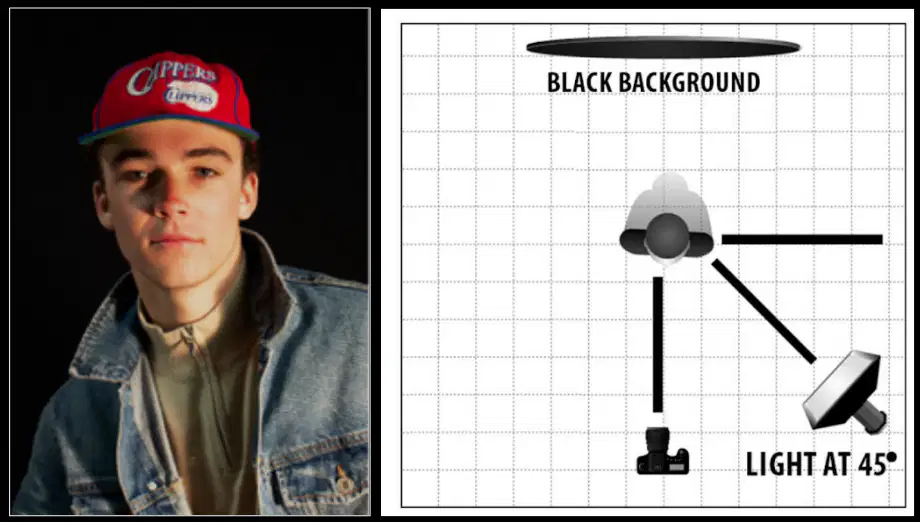
When we were photographing in the studio using lights, in order to get the most accurate and best meter reading, what did we do?
We set our metering mode to "spot metering" and zoomed into the lightest cheek to read the light.
We set our metering mode to "center weighted average metering" and took a reading of the entire face.
We set our metering mode to "partial metering" and metered for the black background.
We set our metering mode to "evaluative" and zoomed out to meter the entire body.

