
 Worksheets
On Board a Microcontroller
Total questions: 32
Worksheet time: 26mins
The goals of the 'On Board a Microcontroller' activity are:
To learn how to program a microcontroller
To understand the hardware components of a microcontroller
To develop skills in integrating sensors with microcontrollers
All of the above
Which materials are needed for the 'On Board a Microcontroller' activity?
Resistors, capacitors, and a microcontroller
Only a microcontroller
Resistors and capacitors only
Which of the following is a goal of the 'On Board a Microcontroller' activity?
Identify patterns in an algorithm
Learn about history
Study human anatomy
Explore world geography
What is the micro:bit?
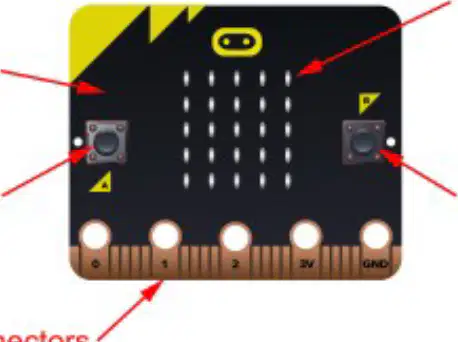
Which of the following is an input option on the micro:bit?
LED Matrix
Temperature Sensor
USB Connector
Bluetooth
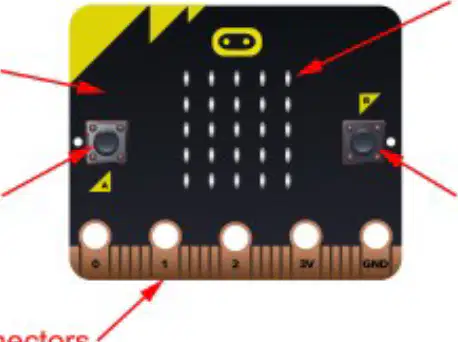
The micro:bit has _______ programmable buttons.
The micro:bit has 2 programmable buttons.
The micro:bit has 3 programmable buttons.
The micro:bit has 4 programmable buttons.
The micro:bit has 5 programmable buttons.
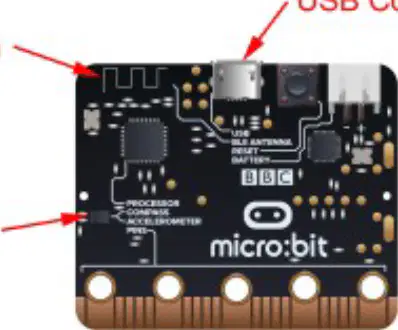
What sensors are included in the micro:bit for motion detection?
The MakeCode Editor is used for:
Creating video games
Programming microcontrollers
Editing photos
Designing websites
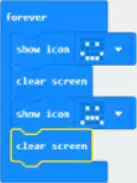
Which type of programming language is based on graphics or visuals?
Text-based programming language
Block-based programming language
Command-line programming language
None of the above
True or False: Block-based programming requires understanding detailed syntax and commands.
True
False
What is pair programming and how is it used in the industry?
Pair programming is a collaborative programming technique where two developers work together at one workstation, commonly used to improve code quality and team collaboration.
Pair programming is a solo programming technique where a developer works alone to improve focus and productivity.
Pair programming is a method of programming where multiple teams work on the same project independently.
Pair programming is a technique used to automate code generation without human intervention.
You can create executable code using the MakeCode editor by:
Writing code in the editor and clicking 'Download'.
Using the 'Run' button to execute directly.
Saving the file as a .exe.
Compiling the code manually.
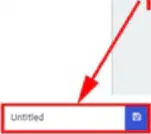
As shown in Figure 4, update the file name from Untitled to ees_323_01_Show2Icons_Name. What does 'Name' represent in this file naming convention?
The version number
The author's name
The date of creation
The project name
Fill in the blank: The MakeCode editor includes an emulator on the left of the window, as shown in Figure 5. The emulator shows a simulation of executing the code in the programming area as it will appear on the physical micro:bit when you send it to the micro:bit later in the activity. The simulation runs continuously but can be controlled using the _______.
control buttons
keyboard
mouse
touchscreen
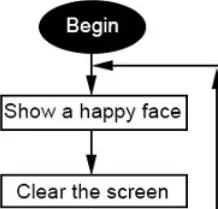
Refer to Figure 7. What is the first step in the flowchart algorithm?
A) Show a sad face
B) Clear the screen
C) Show a happy face
D) Go back to step 1.
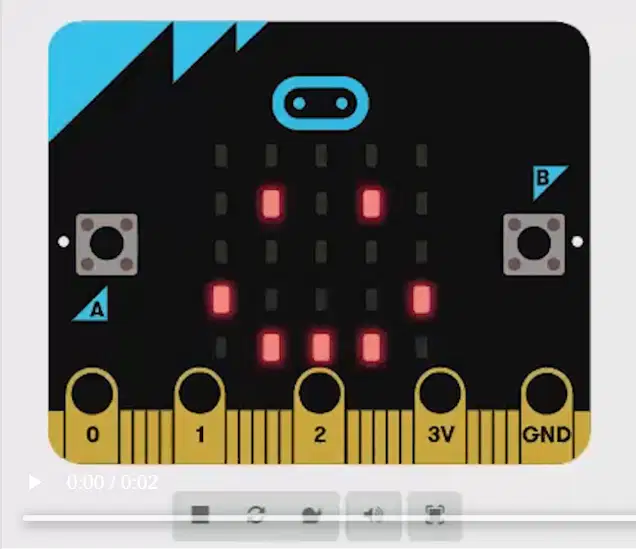
How would you use MakeCode Editor to make a basic block code program yourself?
Use the MakeCode Editor to drag and drop blocks to create the program.
Write the program code manually in a text editor.
Use a pre-built template to start the program.
Import a program from an external source.

Explain the process to create a copy of a code block in MakeCode.
Select the code block, right-click and choose 'Duplicate'.
Drag the code block to the desired location.
Select the code block, right-click and choose 'Clone'.
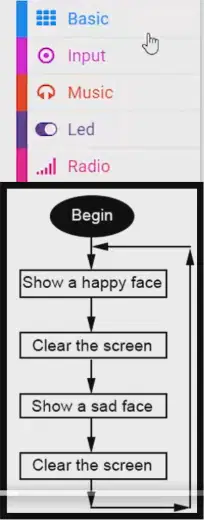
In the flowchart, what is shown after 'Show a happy face'?
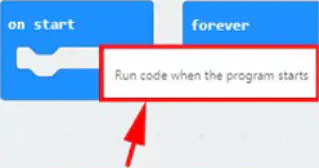
The Forever control block causes the code inside the control block to repeat forever. Predict what will happen if the Forever Control block is replaced with the On Start control block.
The code will run once and stop.
The code will run forever.
The code will not run at all.
The code will run twice and stop.
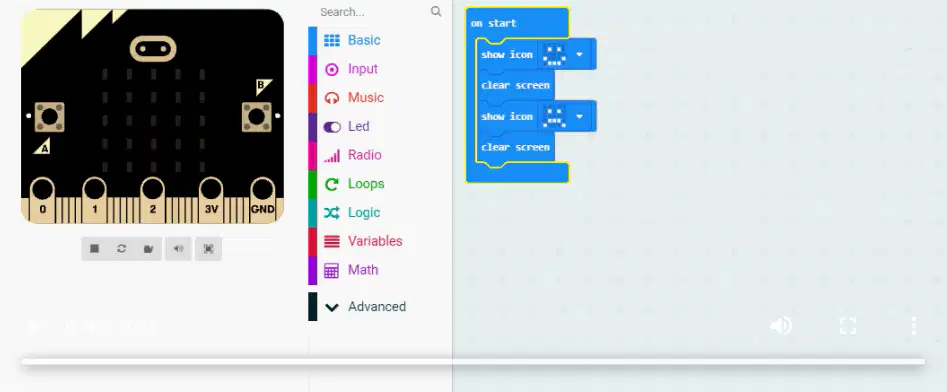
Verify that your emulator simulates the program, as shown in the On Start control block simulation. If the simulation differs from what you expect, then you will need to troubleshoot your program to identify, then repair the problem.
True
False
Reflection Question: How can the Forever and On Start conditional blocks be used to create executable code from your natural language and flowchart algorithms?
By translating natural language into code using these blocks.
By ignoring these blocks in the algorithm.
By using only the Forever block for all tasks.
By using only the On Start block for all tasks.

To connect a micro:bit to a computer, you need to:
Use a USB cable
Use a Bluetooth connection
Use an HDMI cable
Use a Wi-Fi connection
When manually saving the .hex file to a micro:bit, what should you do after selecting 'Download' in MakeCode?
Disconnect the micro:bit
Select an easy-to-find folder
Turn off the computer
Delete the file
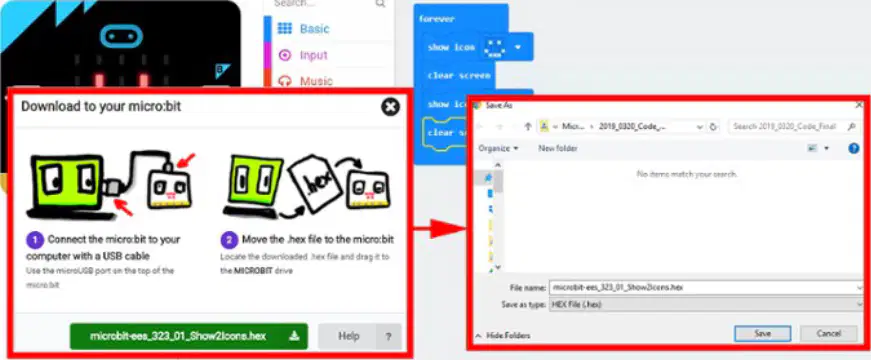
Explain the steps to send a .hex file to the micro:bit as shown in the image.
Connect the micro:bit to the computer, drag and drop the .hex file onto the micro:bit drive.
Open the micro:bit app and upload the .hex file directly.
Email the .hex file to the micro:bit.
Use a special cable to transfer the .hex file.
What control block repeats a program?
Loop block
If block
Wait block
Variable block
What are conditional statements in programming?
The purpose of an if-then conditional statement is to:
execute a block of code if a specified condition is true.
repeat a block of code a certain number of times.
define a function or method.
store data in a variable.
What is the first step (once you are at makecode.microbit.org) to start a new project in MakeCode according to the instructions?
Open the MakeCode editor
Select a project template
Click on 'New Project'
Sign in to your account
What are the steps involved in creating code with your programming partner using Pair Programming?
Identify the problem, Plan the solution, Write the code, Test the program, Debug if necessary
Write the code, Test the program, Identify the problem, Plan the solution, Debug if necessary
Plan the solution, Identify the problem, Write the code, Debug if necessary, Test the program
Test the program, Write the code, Plan the solution, Identify the problem, Debug if necessary
It is important to save each new section of code as a new version during the development process because:
it helps in tracking changes and reverting to previous versions if needed.
it increases the file size unnecessarily.
it makes the code run faster.
it complicates the development process.
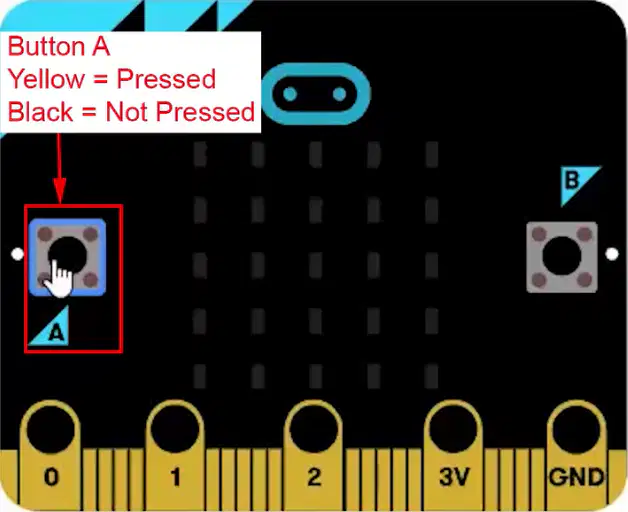
When you send the .hex file to the micro:bit, how do you know that the code is working?
The micro:bit LED matrix displays the same result as the emulator.
The micro:bit LED matrix displays a different result than the emulator.
The micro:bit does not display any result.
The micro:bit LED matrix displays a random pattern.
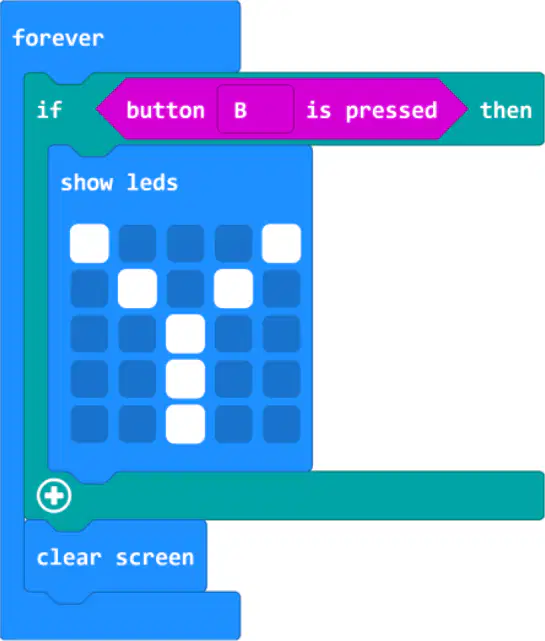
What will the emulator display if button A is pressed?
Displays the letter Y
Displays nothing on the screen
Displays the letter N

