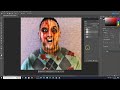
Zombie Creation Techniques in Photoshop
Interactive Video
•
Arts, Design
•
6th - 10th Grade
•
Practice Problem
•
Hard

Lucas Foster
FREE Resource
Read more
10 questions
Show all answers
1.
MULTIPLE CHOICE QUESTION
30 sec • 1 pt
What is the first step in creating a zombie from an image?
Select a random image from your gallery.
Use an image of someone screaming.
Draw a zombie from scratch.
Use a pre-made zombie template.
2.
MULTIPLE CHOICE QUESTION
30 sec • 1 pt
Where should you save your project files in Photoshop?
In the Downloads folder.
In a new folder called Zombie project.
In the Recycle Bin.
On the desktop.
3.
MULTIPLE CHOICE QUESTION
30 sec • 1 pt
What texture is used to create the zombie's skin?
Tree bark texture
Sand texture
Metal texture
Water texture
4.
MULTIPLE CHOICE QUESTION
30 sec • 1 pt
What is the purpose of lowering the opacity of the bark layer?
To remove the texture completely.
To create a transparent effect.
To make the image brighter.
To blend the texture with the skin.
5.
MULTIPLE CHOICE QUESTION
30 sec • 1 pt
Why is it important to pick up your finger off the mouse while erasing?
To prevent the computer from overheating.
To avoid erasing too much at once.
To save the project automatically.
To change the eraser size.
6.
MULTIPLE CHOICE QUESTION
30 sec • 1 pt
What tool is used to add depth to the zombie's features?
Smudge tool
Dodge tool
Burn tool
Blur tool
7.
MULTIPLE CHOICE QUESTION
30 sec • 1 pt
How can you make the zombie's clothes appear more realistic?
By adding bright colors.
By burning them to look worn.
By erasing them completely.
By adding glitter effects.
Access all questions and much more by creating a free account
Create resources
Host any resource
Get auto-graded reports
Continue with Google

Continue with Email
Continue with Classlink
Continue with Clever
or continue with
Microsoft
%20(1).png)
Apple
Others
Already have an account?
