

Woodwork Theory 1 - Lesson

Presentation
•
Education
•
9th Grade
•
Practice Problem
•
Hard

Rachael Miller
Used 1+ times
FREE Resource
28 Slides • 0 Questions
1

WOODWORK
Theory ONE
2

TOPICS
• Measuring & marking
• Materials & fixings
• Reading drawings
• Bench work
• Wood joints; carcass & flat frame
• Safe use of machines and tools
• Finishes (and cramping)
• Sustainability & recycling
3


• Marking gauge - marking a parallel line
on the edge of wood (one spur)
• Mortise gauge - marking mortise and tenon
joints (two spurs)
• Try-square - for marking and checking
90° angles of wood.
• Steel Rule – used for measuring only
Measuring & Marking
The following tools are used in woodwork for measuring and marking purposes.
You are required to know the name and the purpose of each tool
4

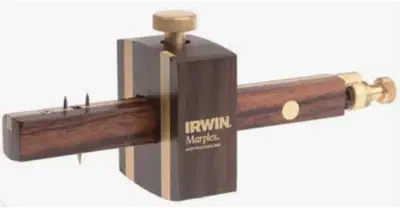
MORTISE GAUGE
Measuring & Marking
SPURS
THUMB SCREW
STEM
STOCK
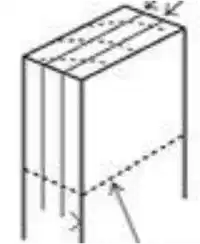
Mortise gauge marks ends of wood
Try-square marks surface of wood
MORTISE & TENON JOINT
You are also required to know the parts of the marking/mortise gauge.
5

Measuring & Marking
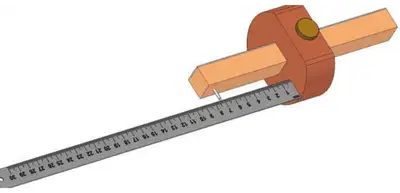
Q. Explain how you would set the marking
gauge to half the depth of a piece of wood?
METHOD ONE:
1. Measure full depth of wood.
2. Sit your steel rule on the stock and
set the spur to half the depth using
the thumb screw to tighten.
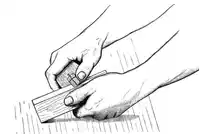
METHOD TWO (without measuring):
1. Set marking gauge to approximately
half depth and create a spur mark.
2. Repeat the process creating a spur
mark from the opposite edge.
3. Continue the process of adjusting
marking gauge using thumbscrew until
centred.
You may also be asked different ways you can set a marking/mortise gauge
6
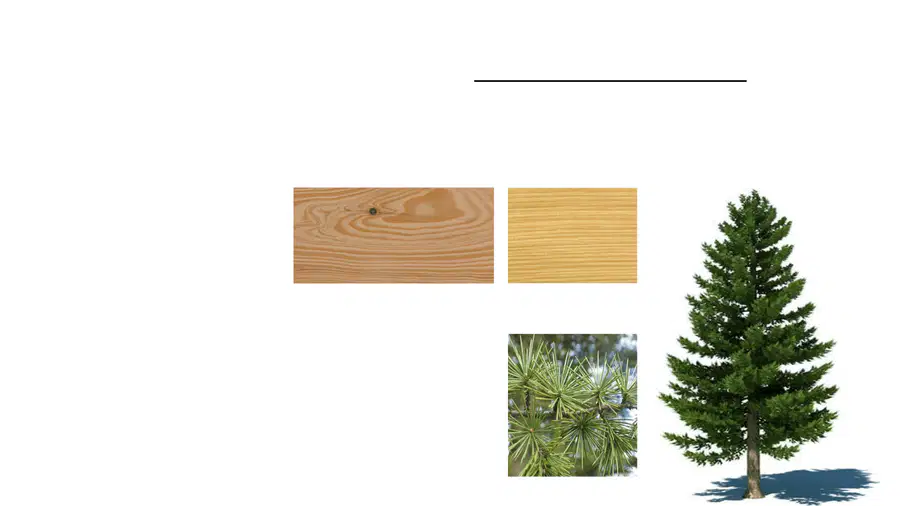
Materials & Fixings
• SOFTWOOD – comes from coniferous trees (needles and do not fall off seasonally)
o Pine (White & Red)
o Larch
o Cedar
Wood can be split into three categories; soft, hard and manufactured. You are required to know a selection of woods from each category including their properties.
PROPERTIES
-Fast growing – 30 years(making it more
sustainable)
-Cheaper than hardwoods
-Easier to work with than hardwoods
-Not as durable as hardwood
-Can be sourced locally so reduced
transport pollution
7
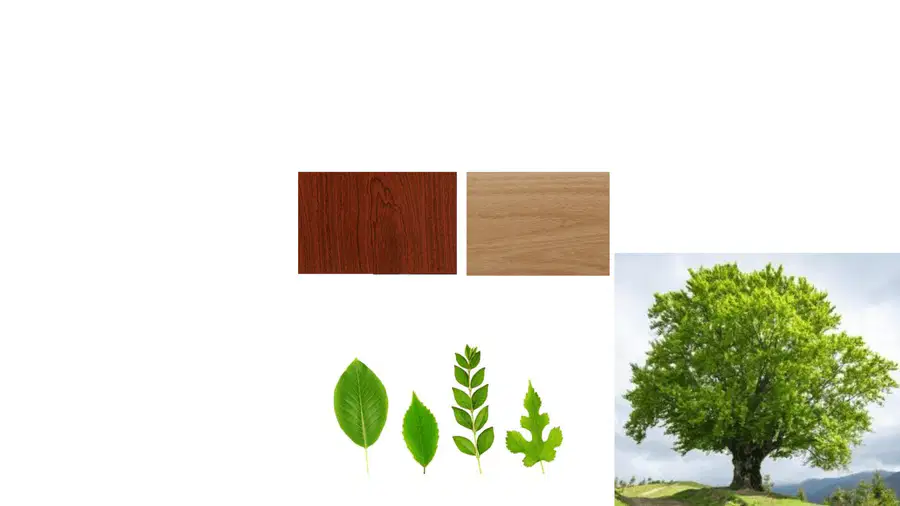
Materials & Fixings
• HARDWOOD – comes from deciduous trees (leafy and DO fall off seasonally)
o Ash
o Beech
o Mahogany
PROPERTIES
-Grows slowly – 100 years(making it less sustainable)
-More durable and stronger than soft
-More expensive than soft
8
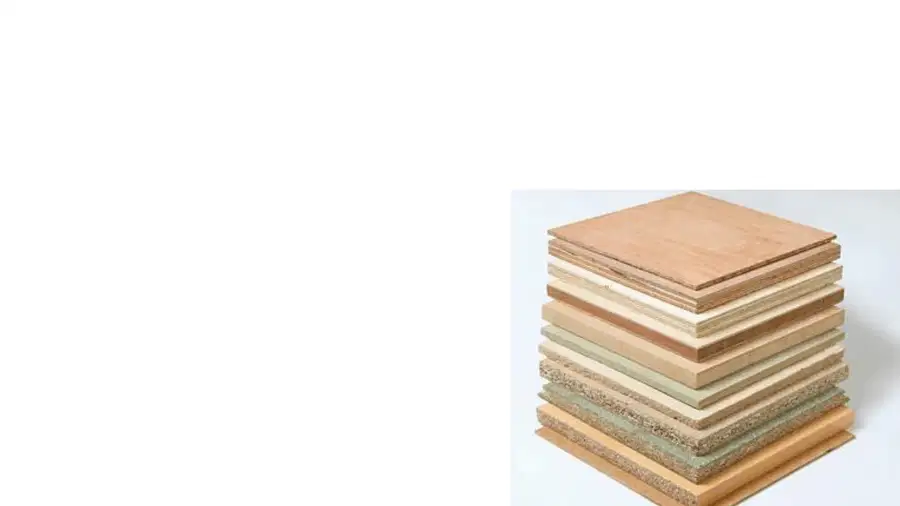
Materials & Fixings
• MANUFACTURED BOARD
o Hardboard
o Chipboard
o Plywood
PROPERTIES
-Comes in large sizes
-Made from waste wood (making it most
sustainable)
-Cheaper than natural wood
-Not as durable/easier to damage
9

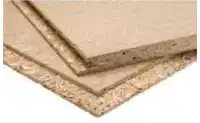
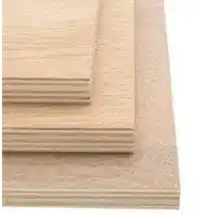
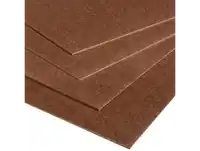
Materials & Fixings
Plywood is made by gluing at
least three layers of sheet
timber together at right
angles to each other - this is
called laminating
Uses
Used in areas hidden from view
that offer support such
as floors, walls and roofs in
residential construction.
Chipboard is made by
mixing particles or flakes
of wood, stick together
with a resin and form the
mixture into a sheet. It is
often covered by a veneer.
Uses
Flat pack furniture
Kitchen worktops
Hardboard is made by
adding water to wood pulp
and pressed under high
temperatures removing the
water.
Sheets are smooth
on one side and textured
on the other.
Uses
Backs of cabinets, bases
of drawers. Only inside.
You may be asked how each manufactured board is made as well as its uses.
10
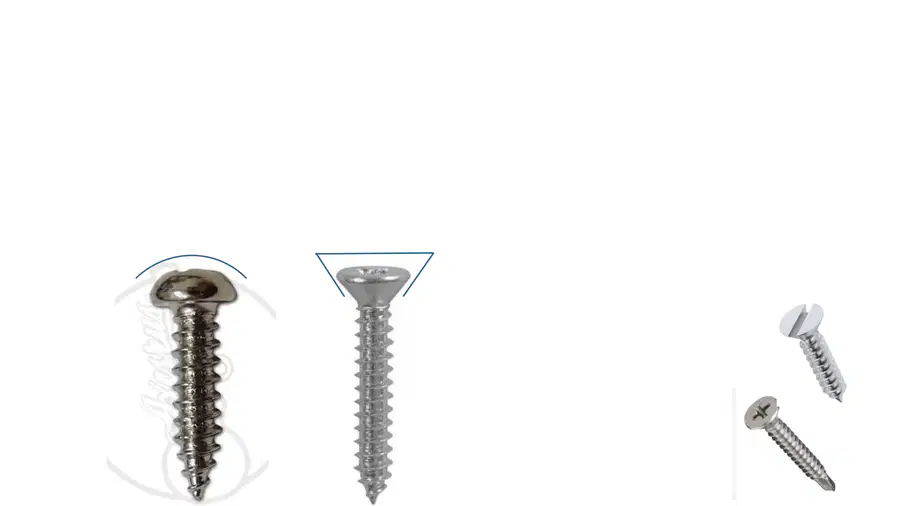
Materials & fixings
TYPES OF SCREW HEAD
• Slotted head
|
• Cross head
X
You are required to know about different types of screw.
TYPES OF SCREW
• Round/dome head - is a type of screw with a rounded head that protrudes above
the surface of the material it is fastening
• Countersink - a type of screw designed to sit flush or below the surface of the
material it is driven into.
ROUND HEAD
COUNTERSINK
11
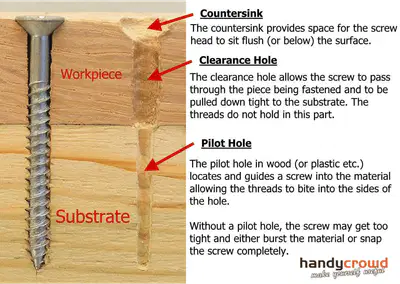
Materials & Fixings
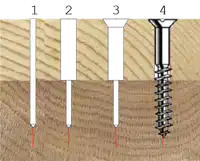
The purpose and process of countersinking screws
1. Drill pilot hole
2. Drill clearance hole
3. Counter sink
4. Insert screw
Process:
12

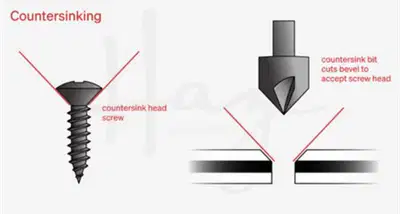

A countersink rose drill bit is used to create the
bevel for screw head
Purpose: Countersinking a
screw allows it to sit flush
with the work piece. This gives
a more professional look.
What is the purpose of countersinking?
13

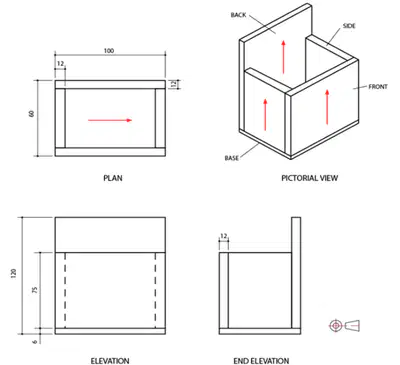
• Working drawings -
detailed diagrams that provide specific instructions and information for construction
WORKING DRAWING
Reading Drawings
14

Reading Drawings
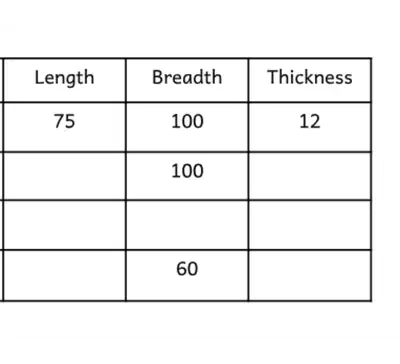
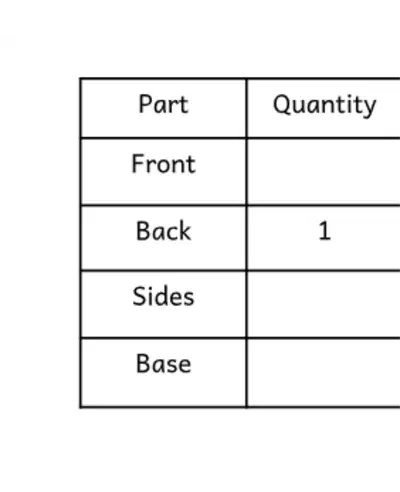
In practical woodwork you must know how to extract information from working
drawings to create cutting lists
CUTTING LIST
• Cutting lists -are a
straightforward list
that outlines all the
pieces of material
needed for a project,
along with dimensions
and quantities.
15

Reading Drawings
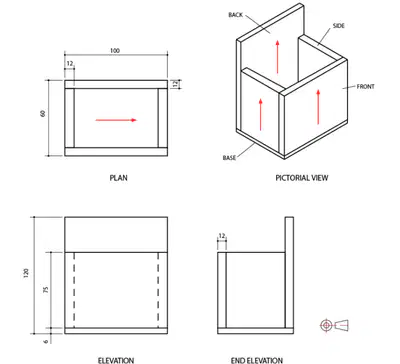
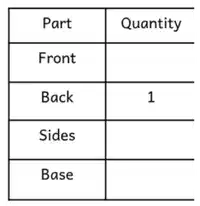
How many 'FRONT' pieces are needed?
Look at the Pictorial view
1
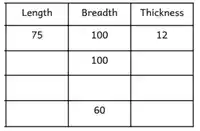
What is the length and thickness of the
back piece?
Look at the Plan for thickness and Elevation for length
114
12
How many sides do you need?
Look at the Pictorial view
2
What is the length, breadth and thickness
of the sides?
Look at the Elevation for length, Plan for breadth and
End Elevation for thickness
75
36
12
How many bases do you need and what is the
length and thickness?
Look at Pictorial for quantity, Plan for length & Elevation
for thickness
1
100
6
16


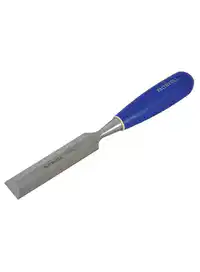
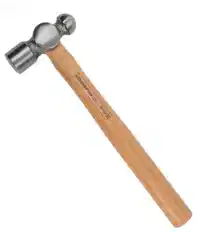
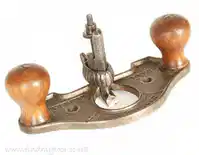
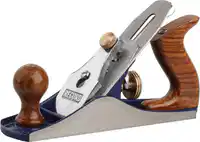
Bench Work
• Hand tools
o Mallet – used to drive chisel in to wood
o Ball pein hammer – used to drive nails into wood or round off edged of pins
o Bevel edged chisel – to remove areas of wood
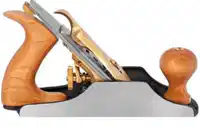
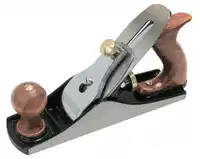
o Smoothing plane – used at final stage to remove fine wood shavings and smooth wood
o Hand router – to remove a groove in wood
You are required to know the names and uses of a variety of hand tools.
17

Bench Work
You are also required to know how to set up various hand tools.
SMOOTHING PLANE
1. Using the adjusting
nut, set the blade
to the correct depth
of cut.
2.
Using the adjusting
lever to make sure
the blade is level.
(You must link the nut to
the depth and the lever to
the level/angle)
BLADE
LEVER CAP
FRONT HANDLE
TOE
HEEL
DEPTH ADJUSTING NUT
HANDLE
LATERAL ADJUSTING LEVER
Q. How do you set up a plane
before use?
18


Bench Work
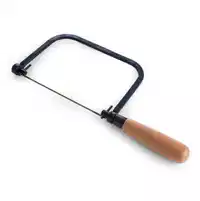
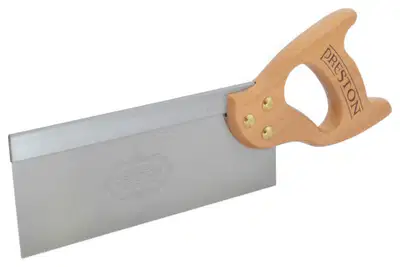
• Saws
o Coping saw – to cut intricate shapes
o Tenon saw – to cut straight lines
o Cross cut saw – used when cutting across wood grain
19

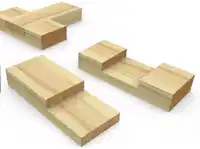
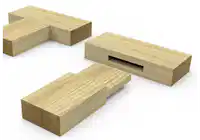
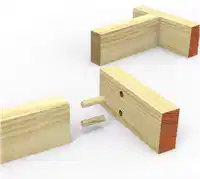
Jointing techniques
• Flat frame -
Flat frame joints are primarily used for joining pieces of wood along a flat plane to create larger panels or surfaces, such as tabletops, doors, or panels.
o Halving
o Mortise and tenon
o Dowel
HALVING
MORTISE & TENON
DOWEL (flat frame & carcass)
You are required to know joints suitable for flat frame construction as well as joints suitable for carcass construction.
You also need to be able to describe tools and processes used to manufacture these joints
20

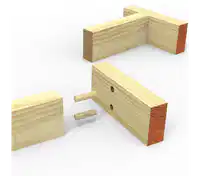
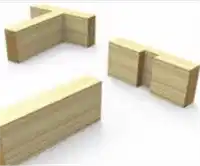
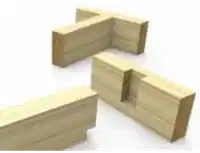
• Carcass - Carcass joints are typically used in furniture making to construct the
main framework or skeleton of a piece, such as cabinets, drawers, or chests.
o Through housing
o Stopped housing
o Dowel
Jointing techniques
DOWEL (flat frame & carcass)
THROUGH HOUSING
STOPPED HOUSING
21
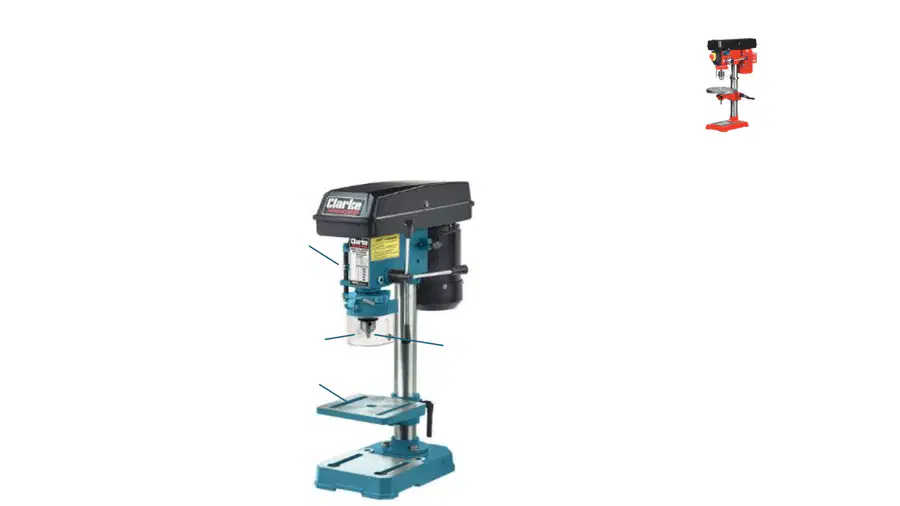
Machine use and safety
• Machines
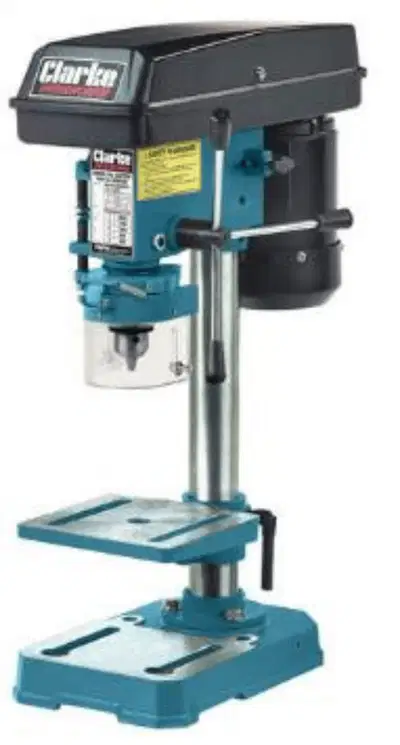
oPillar drill
Use: Cutting round holes in
material
Safety checks:
- Tray table is secure
-Drill bit is secure
-Chuck key is removed
-Guard is down
DEPTH STOP
CHUCK GUARD
TRAY TABLE
CHUCK
22

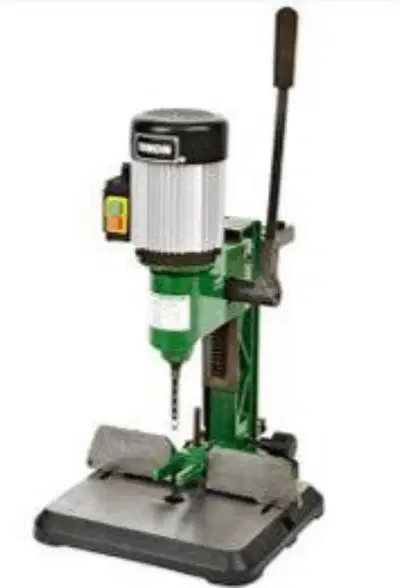
• Machines
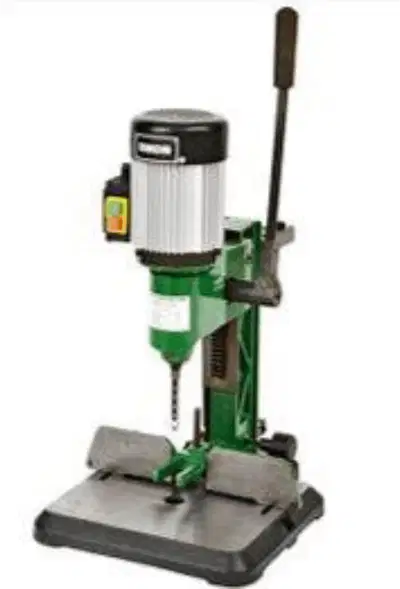
oMortise machine
Machine use and safety
Use: Cutting square holes in wood
Safety checks:
-Workpiece is secured
-Cutting chisel is secured
-Cutting chisel and drill bit are not
damaged or clogged
-Lever should move freely
-Table can move freely in all directions
23

Machine use and safety
Q- Describe two methods of
ensuring a hole is drilled to a
specific depth
using the pillar
drill or mortise machine
METHOD ONE: set depth stop to
required depth
METHOD TWO: mark drill/cutting
chisel at required depth.
24

Machine use and safety
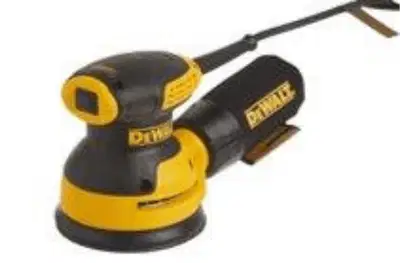
• Power tools
oOrbital sander
Use: Creating a smooth surface on wood.
Removing paint/varnish.
Safety checks:
-
extraction/dust bag is connected to
the sander
-
ensure dust bag is empty
-
cord/power cable checked for damage
-
no damage to casing
-
ensure power tool is switched off
before plugging in
-
ensure handle is secure
25


Machine use and safety
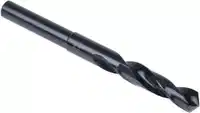
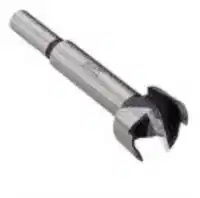
• Drill bits
o Twist
o Forstner
o Countersink rose
Use: drilling larger
and
flat bottomed holes
Use: Creates round holes in
wood, metal and plastic
Remember when drilling large holes always
set the drill to a slow speed. If the holes are
bigger than 10mm it is generally safer to drill
a Pilot Hole first.
(A pilot hole is a smaller hole, say 5mm, that
will act as a guide for the larger drill)
Use: Creates a tapered hole to
allow for screw head
26

Finishes
• Finish preparation
o Remove all pencil marks
o Soak the grain so it rises
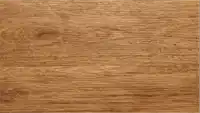
o Sand with the grain - (start with a coarse grit (60-100) and work towards
fine grit (240-320)
o Remove all dirt and dust
You are required to know how to prepare your wood before applying a finish as well as
types of finishes and steps involved in gluing and clamping.
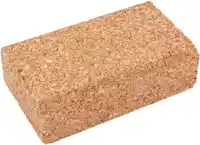
A cork block wrapped with
sandpaper can be used to aid
sanding.
27

Finishes
• Finishes
o Vegetable oil – Natural look, food safe, low durability
Application: cloth
o Varnish – Enhanced appearance allowing you to still see natural
grain, enhanced protection
Application: Brush
o Paint – Colourful, protection, customisation
Application: brush or spray
You may be asked how to apply various finished or asked to suggest a suitable finish for a
certain product.
28

Finishes
• Cramping
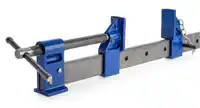
Sash clamp -used primarily
for clamping large workpieces together during glue-ups or
assembly processes.
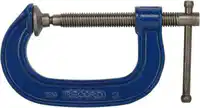
G clamp -
are commonly used to hold pieces of wood together during cutting, drilling, sanding, gluing, and assembly.
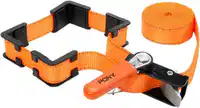
Band cramp – holding together the corners of square or rectangular assemblies, such as boxes
You may be asked to identify various clamps
SASH CLAMP
G CLAMP
BOX CLAMP
WOODWORK
Theory ONE
Show answer
Auto Play
Slide 1 / 28
SLIDE
Similar Resources on Wayground

21 questions
Best Method: Solving Systems of Equations
Presentation
•
7th - 10th Grade
21 questions
Scientific Revolution
Presentation
•
9th Grade
21 questions
Photosynthesis
Presentation
•
9th Grade
21 questions
Spanish body parts
Presentation
•
9th Grade
21 questions
Cold War Intro
Presentation
•
KG
21 questions
Third conditional
Presentation
•
9th Grade
22 questions
Biogeochemical Cycles Lesson
Presentation
•
9th Grade
22 questions
Rock-paper-scissors (microbit)
Presentation
•
9th Grade
Popular Resources on Wayground
10 questions
Safety Day 2026 – Student Review

Quiz
•
9th Grade
21 questions
Continents and Oceans
Quiz
•
6th Grade
20 questions
Parts of Speech
Quiz
•
5th Grade
16 questions
Subject & Predicate
Quiz
•
5th Grade
25 questions
Multiplication Facts
Quiz
•
5th Grade
12 questions
Map Skills
Quiz
•
3rd Grade
22 questions
Continents and Oceans
Quiz
•
5th Grade
15 questions
Rounding Decimals
Quiz
•
5th Grade