
 Worksheets
Independent Problem Solving Skills Worksheet
Total questions: 91
Worksheet time: 46mins
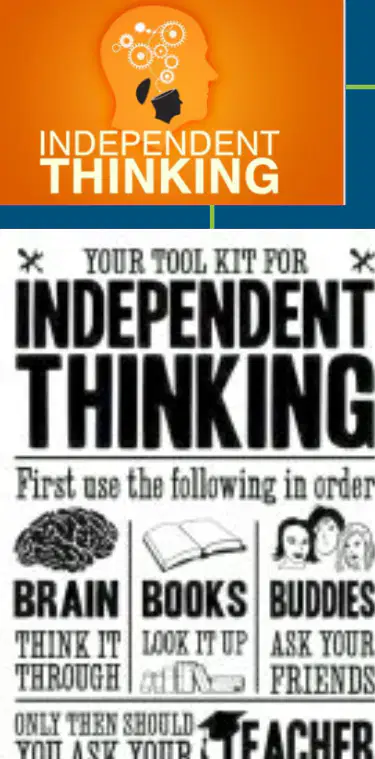
Which of the following should you do first when trying to solve a problem independently?
Ask your teacher
Use your brain and think it through
Ask a friend immediately
Leave your assigned table
According to the instructions, when should you ask your teacher for help?
Before trying anything else
After using your brain, books, and buddies
As soon as you have a question
Only if you leave your table
What is the most important step when you are given directions?
Ignore the directions and do it your way
Use your brain and the directions provided
Wait for someone to help you
Ask your teacher first
If you are stuck on a problem, which of the following is NOT recommended before asking the teacher?
Refer to Mrs. Laughbaum’s instructions
Ask a friend
Use your brain
Leave your assigned table
Why is it important to follow the steps of independent thinking before asking for help?
It helps you develop problem-solving skills and become more self-reliant
It wastes time
It makes the teacher do all the work
It is not important at all
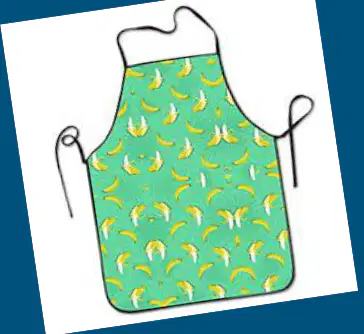
What is the main topic of the learning material shown in the image?
Apron
Gloves
Oven
Shoes
According to the image, what should you do before operating equipment?
Ignore the instructions
Read the instructions
Ask a friend
Start immediately
Which of the following is NOT a criterion for "Layout and Cutting" in the apron grading criteria?
Patterns placed on fabric correctly
Pinned properly before cutting
Cutting is even and accurate
Corners trimmed before turning
What should be checked to ensure the "Optional Pocket" is done correctly?
It lies flat and even, is positioned correctly, and is sewn neatly
It is made of a different fabric, is large, and is colorful
It is attached with glue, is removable, and is decorative
It is only on the left side, is hidden, and is double-stitched
According to the grading criteria, what is an indicator of good "Work Habits"?
Leaving the work area messy
Following directions
Ignoring instructions
Using supplies only once
Which of the following best describes the purpose of "Finishing" in apron construction?
To ensure corners are trimmed, corners are square, and openings are sewn neatly
To add decorations to the apron
To attach the straps to the apron
To make the apron colorful
If a student receives a score of 5 on the apron grading criteria, what does it mean?
Excellent
Good
Average
Poor
Why is it important for seams to have no puckers or bulges?
To ensure the apron looks neat and fits well
To make the apron heavier
To add extra decoration
To make the apron waterproof
A student is struggling with making the ends of the straps look neat. Which grading criterion should they focus on improving?
Ends sewn shut neatly
Corners trimmed before turning
Proper seam allowance used
Thread ends trimmed
Which of the following is NOT listed as a work habit in the apron grading criteria?
Used time well
Worked quietly
Had supplies and equipment daily
Sewed the straps first
What is the main goal of the "Overall appearance" criterion?
To ensure the apron looks neat and clean, and thread ends are trimmed
To make the apron colorful
To add extra pockets
To use the most expensive fabric
If a student did not position the pocket correctly on the apron, which part of the grading criteria would be affected?
Optional Pocket
Finishing
Straps
Work Habits
What is the most important rule to follow when using the sewing machine according to the instructions?
Try to fix the machine if it breaks
Only do what the directions say
Use the machine as fast as possible
Ignore the handout instructions
When should you plug in the power machine while getting acquainted with the sewing machine?
Before step 1
After step 5
Between steps 4 and 5, but keep it off until step 5
At the end of the activity
Why is it important to use the sewing machine with caution and care?
To finish the activity quickly
To avoid damaging the machine and ensure safety
To impress the teacher
To use up all the materials
If a student wants to perform an action not listed on the activity sheet, what should they do?
Ask a friend for advice
Do the action anyway
Only perform actions listed on the activity sheet
Try to guess what to do next
What could happen if you do not follow the directions on the handout when using the sewing machine?
The machine will work better
You might damage the machine or create a safety hazard
You will finish faster
The machine will clean itself
Why is it important to read the directions and rubric carefully before starting the activity?
To understand what is expected and how to succeed
To waste time
To avoid doing the activity
To skip steps
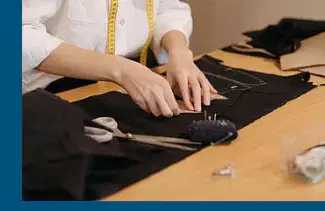
Which line should you cut all pieces on when cutting a paper pattern?
The dotted red line
The solid black line
The dashed blue line
The wavy green line
What should you do after cutting out all the paper pattern pieces?
Throw them away
Fold them carefully in your bin
Leave them on the table
Color them with markers
Why is it important to write your name on all of the paper pattern pieces?
So you can decorate them
So you can identify your pieces
So you can cut them faster
So you can throw them away
If you cut the paper pattern pieces unevenly, what problem might you face later?
The pieces may not fit together properly
The pieces will look more colorful
The pieces will be easier to fold
The pieces will be stronger
What is the first step when preparing fabric according to the instructions?
Pin pattern to fabric
Cut the fabric
Fold and iron fabric in half
Ask for approval
Before cutting any fabric, what must you do?
Fold the fabric again
Ask for Mrs. Laughbaum’s approval
Pin the pattern to the fabric
Iron the fabric again
Which step comes after folding and ironing the fabric in half?
Cut the fabric
Pin pattern to fabric
Ask for approval
Wash the fabric
Why is it important to ask for Mrs. Laughbaum’s approval before cutting the fabric?
To make sure the pattern is correct and avoid mistakes
To save time
To finish faster
To avoid ironing
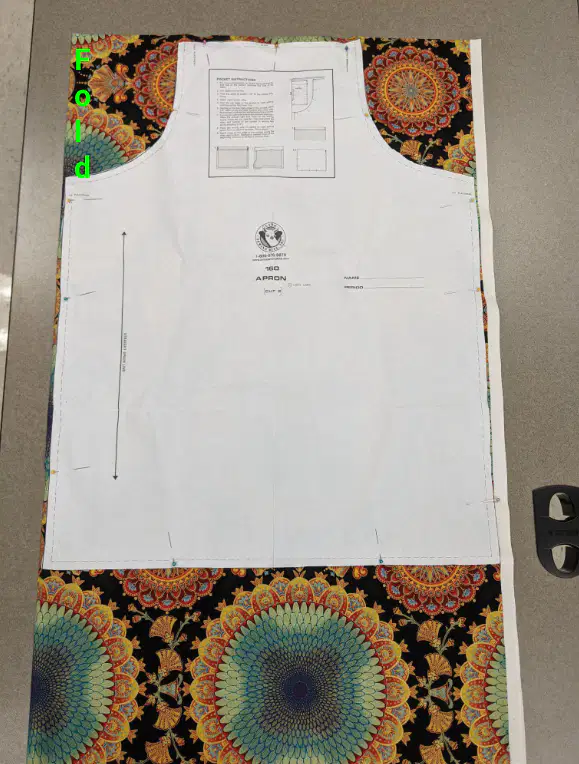
What should your pinned apron look like before you start sewing?
It should look like the example shown in the picture, with the pattern pieces laid out as directed.
It should be folded in half with no pattern pieces.
It should be cut into small pieces before pinning.
It should be pinned without using any paper pattern.
According to the instructions, what should you use to see how to pin on the pocket?
The paper directions picture
The finished apron
The fabric only
The sewing machine manual
Why is it important to lay out your apron pattern pieces just like the paper directions?
To ensure the apron is assembled correctly
To make the apron look colorful
To save time on sewing
To avoid using pins
If a student forgets to use the paper directions picture, what problem might they face when pinning the pocket?
The pocket may be pinned in the wrong place
The apron will be too small
The fabric will change color
The sewing machine will not work
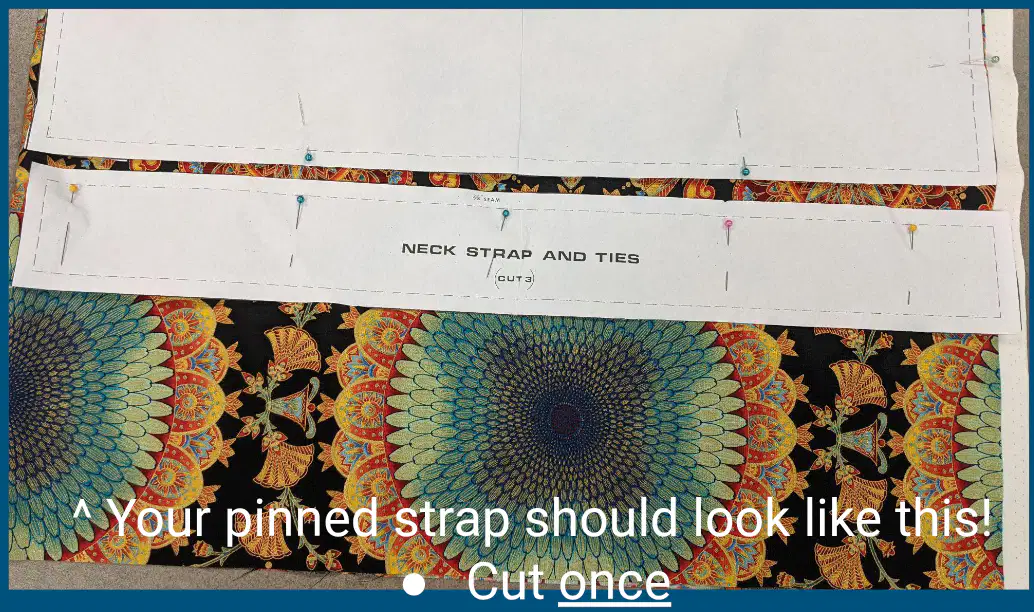
What is the first step after pinning the neck strap and ties pattern to the fabric?
Cut once
Unpin the pattern
Repin to remaining fabric
Sew the fabric
After cutting the strap fabric once, what should you do next according to the instructions?
Repin to remaining fabric
Throw away the pattern
Iron the fabric
Sew the pieces together
Why is it important to unpin and repin the pattern to the remaining fabric after the first cut?
To ensure you have enough pieces cut from the fabric
To make the fabric look neat
To avoid using pins
To change the color of the fabric
What should you do after pinning is approved when working with a pattern?
Cut very carefully
Unpin the pattern immediately
Skip to the next step without cutting
Remove all pins before cutting
According to the instructions, what should you NOT do after cutting the pattern?
Unpin the pattern
Mark the next step
Cut very carefully
Use scissors
Why is it important to keep the pattern pinned after cutting, based on the instructions?
To ensure the pattern stays in place for the next step
To make it easier to remove the fabric
To avoid losing the pins
To save time on marking
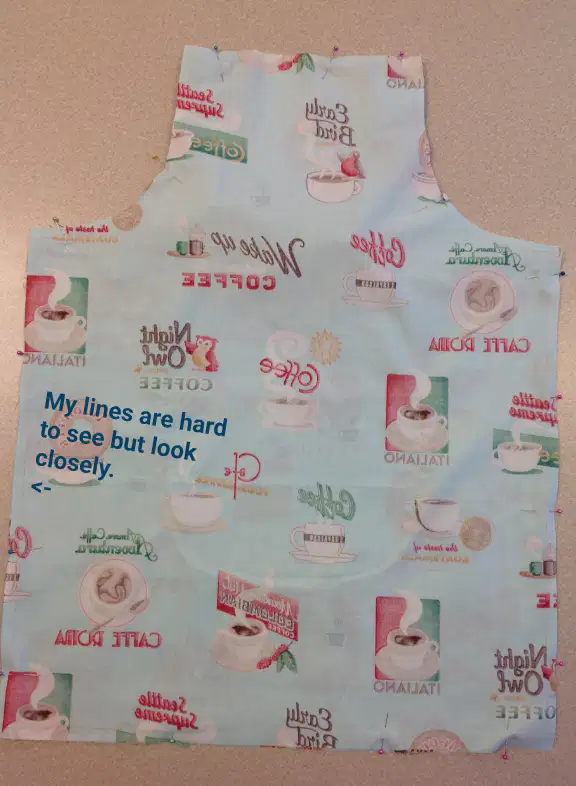
According to the instructions, onto which side should sewing lines be transferred?
The right side
The wrong side
Both sides
The inside only
Why is it important to transfer sewing lines onto the wrong side of the fabric?
Because the wrong side is easier to see
Because we are sewing wrong sides out, so lines on the right side won't help
Because the right side is too slippery
Because the wrong side is always darker
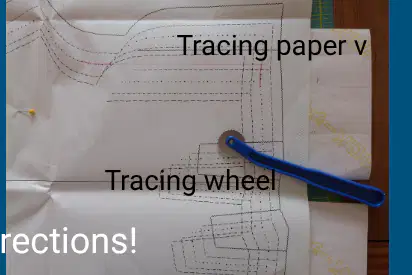
What tool is shown in the image for transferring sewing lines?
Scissors
Tracing wheel
Needle
Ruler
If you accidentally transfer sewing lines onto the right side of the fabric, what problem might you encounter?
The fabric will tear
The lines will not help you when sewing wrong sides out
The fabric will shrink
The lines will disappear
What is the first step you should practice on scrap fabric according to the instructions?
Sewing a zigzag line
Sewing a straight line
Sewing a buttonhole
Sewing a circle
When practicing a straight line with reverse, when should you use the reverse function?
Only at the beginning
Only at the end
At both the beginning and end
In the middle of the line
What must you do before rotating the fabric to sew the next line at a corner?
Lift the presser foot
Raise the needle
Make sure the needle is in the down position
Cut the thread
Why is it important to show Mrs. L your completed practice before beginning straps?
To get extra credit
To ensure you have mastered the basic sewing skills
To receive a new sewing machine
To skip the next step
What should be the position of the presser foot and needle when you begin sewing?
Both up
Presser foot down & needle up
Presser foot up & needle down
Both down
Which of the following is NOT a step listed for practicing on scrap fabric?
Straight line
4 Corners (pivot)
Sewing a buttonhole
Straight line with reverse at beginning and end
If you are sewing four corners (pivot), what skill are you practicing?
Changing thread color
Pivoting at corners
Sewing a hem
Attaching a zipper
When folding straps in half for sewing, which side should be facing out?
Right sides out
Wrong sides out
Both sides out
No sides out
What should you be able to see after folding the straps in half as instructed?
The finished edge
Your marking lines
The right side of the fabric
The inside seam
What is the next step after folding and pressing the straps as described?
Cutting the straps
Sewing the straps
Ironing the straps again
Attaching the straps to the garment
If you need additional help with the next step, where can you find a video demonstration?
Slide 10
Slide 20
Slide 36
Slide 50
What is the first step to do after sewing straps, according to the instructions?
Trim loose threads and edges
Iron them flat and even
Turn them right side out
Sew the straps again
Which tool can be used to help turn the straps right side out?
Spoon
Pencil or chopstick
Fork
Ruler
Why is it important to trim loose threads and edges after sewing straps?
To make the straps longer
To prevent fraying and create a neat finish
To change the color of the straps
To make the straps thicker
After turning the straps right side out, what should you do next?
Cut the straps in half
Iron them flat and even, with edges on the side
Add more fabric
Sew them again
Which of the following is NOT mentioned as a step after sewing straps?
Ironing the straps
Trimming loose threads
Painting the straps
Turning the straps right side out
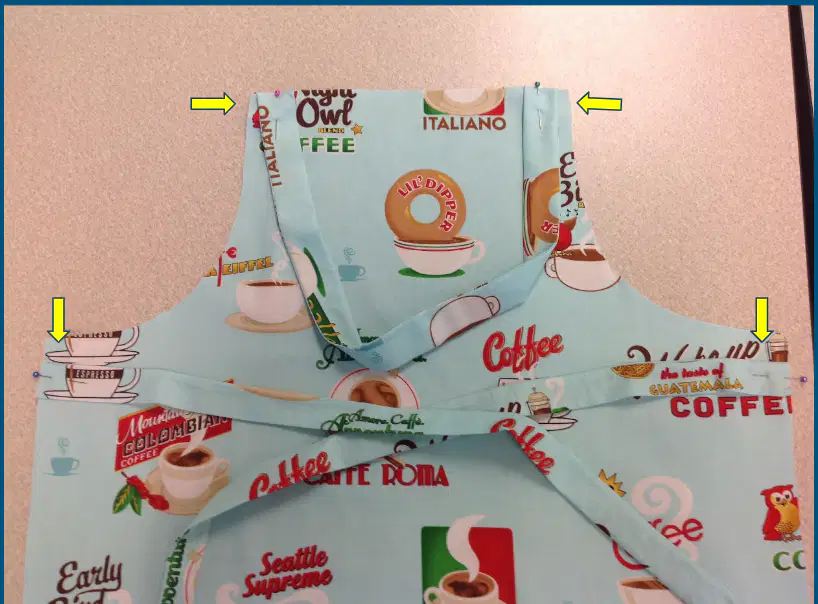
When pinning straps in place on your apron, to which side of the apron body piece should you pin the straps?
Left side
Right side
Both sides
Bottom side
What should you make sure of when pinning the straps to the apron body piece?
The straps are uneven distances from the edge
The straps are even distances from the edge
The straps are pinned only at the corners
The straps are pinned to both sides
According to the instructions, where should you avoid placing the neck strap when pinning it to the apron?
Too close to the left and right edges
Too close to the bottom edge
In the center of the apron
On the back of the apron
What is the next step after pinning the straps in place and making sure they are even distances from the edge?
Cut the straps
Get approval
Remove the pins
Iron the apron
Why is it important not to pin the side straps too close to the top edge of the apron?
It makes sewing easier
It ensures the straps are secure and functional
It makes the apron look better
It saves fabric
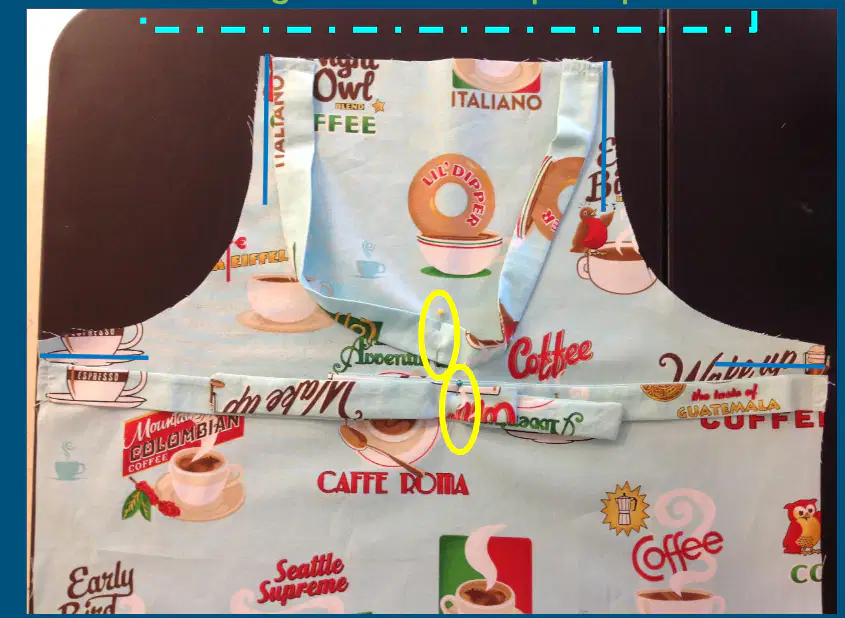
What should you do with the straps before adding the second apron piece?
Pin the straps down
Cut the straps off
Sew the straps after adding the second piece
Ignore the straps
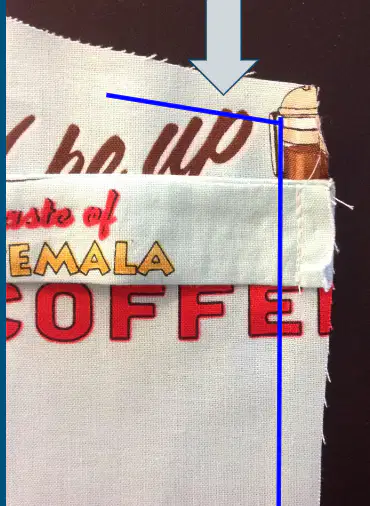
According to the instructions, what mistake was made with the straps in the first image?
The straps crossed the blue sewing lines
The straps did not cross the marked (blue) sewing lines
The straps were sewn upside down
The straps were missing
Why is it important to pin the straps down before adding the second apron piece?
To keep the straps in place during sewing
To make the apron look colorful
To avoid cutting the fabric
To make the apron smaller
When pinning the apron pieces together, which side should be facing out of both pieces?
The right side
The wrong side
Both sides should be facing in
It does not matter
What should you make sure of regarding the straps inside when pinning the apron pieces together?
The straps should cross the sewing lines
The straps should be outside the apron
The straps inside should NOT cross the sewing lines
The straps should be sewn separately
Why is it important to ensure the right sides are in when pinning the apron pieces together?
To make the apron look more colorful
To ensure the correct side is visible when finished
To make sewing easier
To avoid using pins
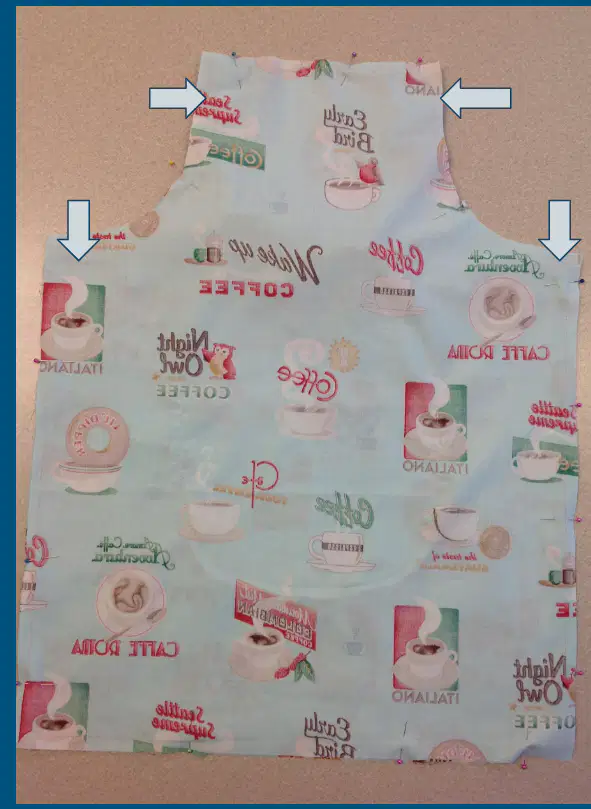
What do the arrows in the diagram indicate?
Where to start sewing
Where the straps should not cross the sewing lines
Where to place the pins
Where to cut the fabric

Where should you start sewing according to the instructions shown in the image?
At the top right corner of the fabric
At the bottom right corner, where it says "Start here"
In the middle of the fabric
At the left edge of the fabric

What does the instruction "Reverse about 1''" mean in the context of sewing as shown in the image?
Sew backwards for about 1 inch to secure the stitch
Cut the fabric for 1 inch
Fold the fabric for 1 inch
Leave a 1 inch gap unsewn

According to the image, what should you do with the section labeled "LEAVE OPEN"?
Sew it closed
Leave it unsewn
Cut it off
Fold it over

Why is it important to reverse stitch at the beginning and end of the seam as shown in the image?
To make the seam look neat
To prevent the stitches from unraveling
To make the fabric softer
To mark the seam for later steps

What should you do after you finish your work, according to the instructions?
Leave your seat and talk to friends
Stay in your assigned seats
Go to the cafeteria
Start a new project without permission

Which of the following is NOT listed as a step to complete after finishing your project?
Double check the paper directions
Fill out the apron rubric
Pin to your apron
Wash the windows

What should you do with your apron after pinning the rubric to it?
Take it home
Hang it on the hook in the laundry room
Throw it away
Leave it on your desk

What is one of the upcoming tasks mentioned in the instructions?
Work on kitchen safety/sanitation unit notes
Prepare a science experiment
Write a book report
Organize a field trip

Why is it important to double check the paper directions before turning in your project?
To make sure you have completed all required steps
To make your project look more colorful
To impress your classmates
To finish faster
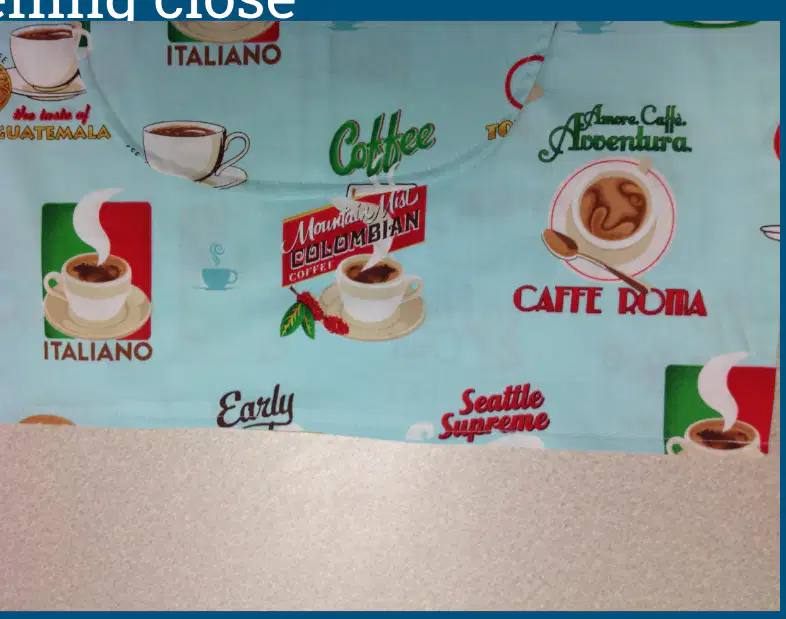
What are the two options mentioned for sewing the opening closed?
Sew just the opening or sew all the way across the bottom
Sew only the sides or leave it open
Sew only the top or sew only the corners
Sew in a zigzag pattern or a straight line
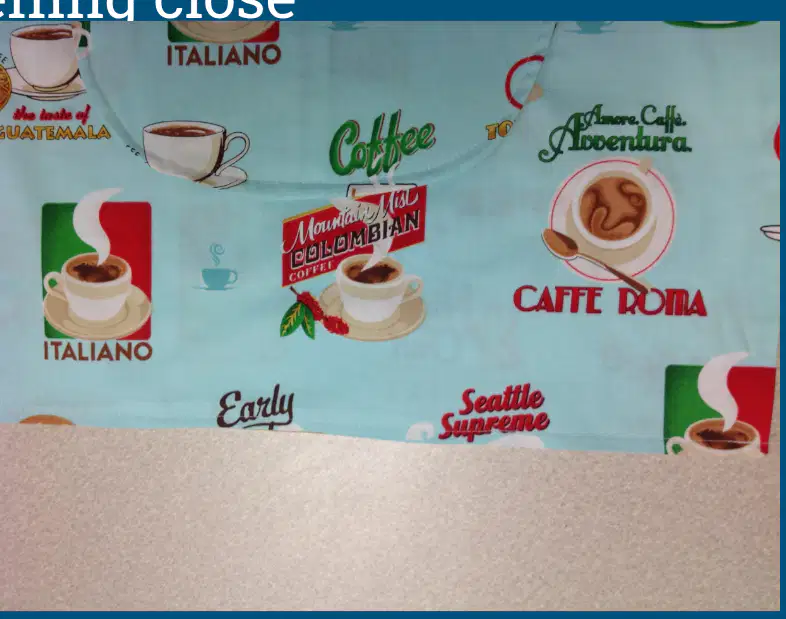
According to the instructions, who decides how to sew the opening closed?
The teacher
The student
The principal
The manufacturer
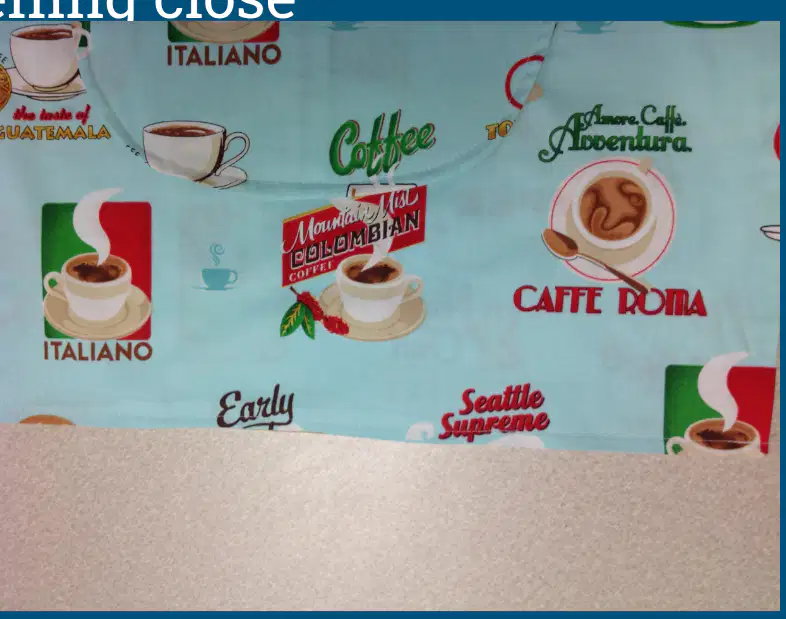
Why might someone choose to sew all the way across the bottom instead of just the opening?
To make the fabric look more decorative
To ensure the bottom is securely closed
To save time
To use less thread
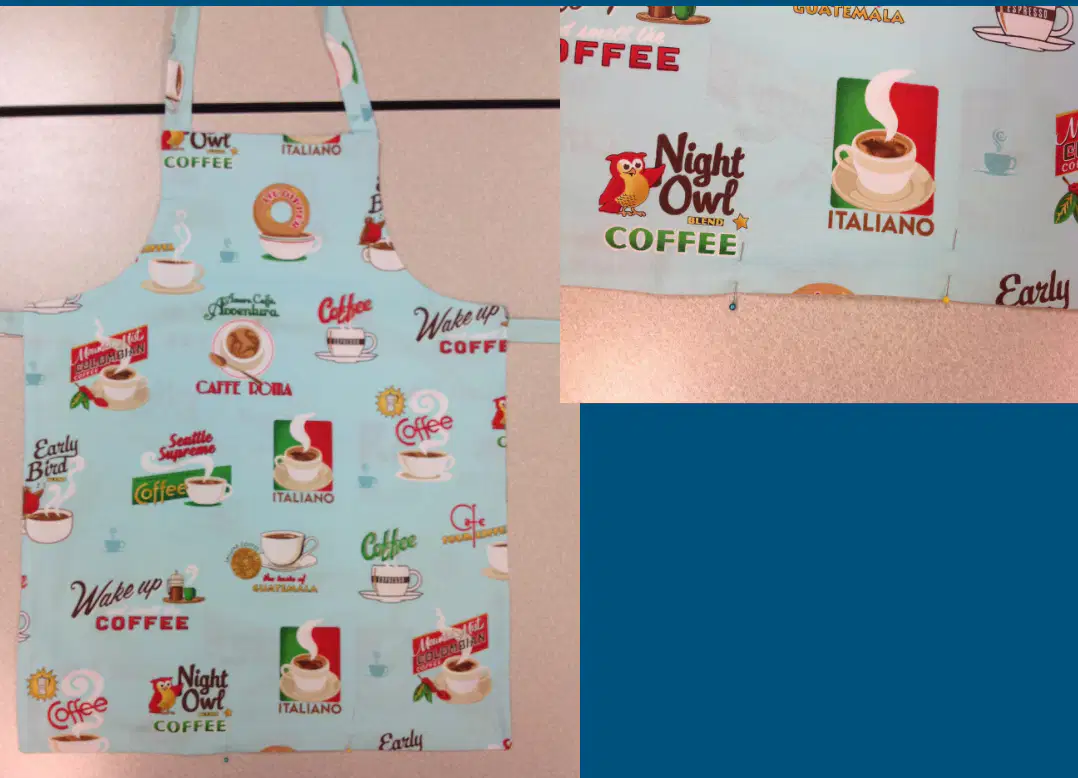
What should you make sure of when flipping fabric right side out?
The corners are square
The fabric is wrinkled
The fabric is inside out
The corners are rounded
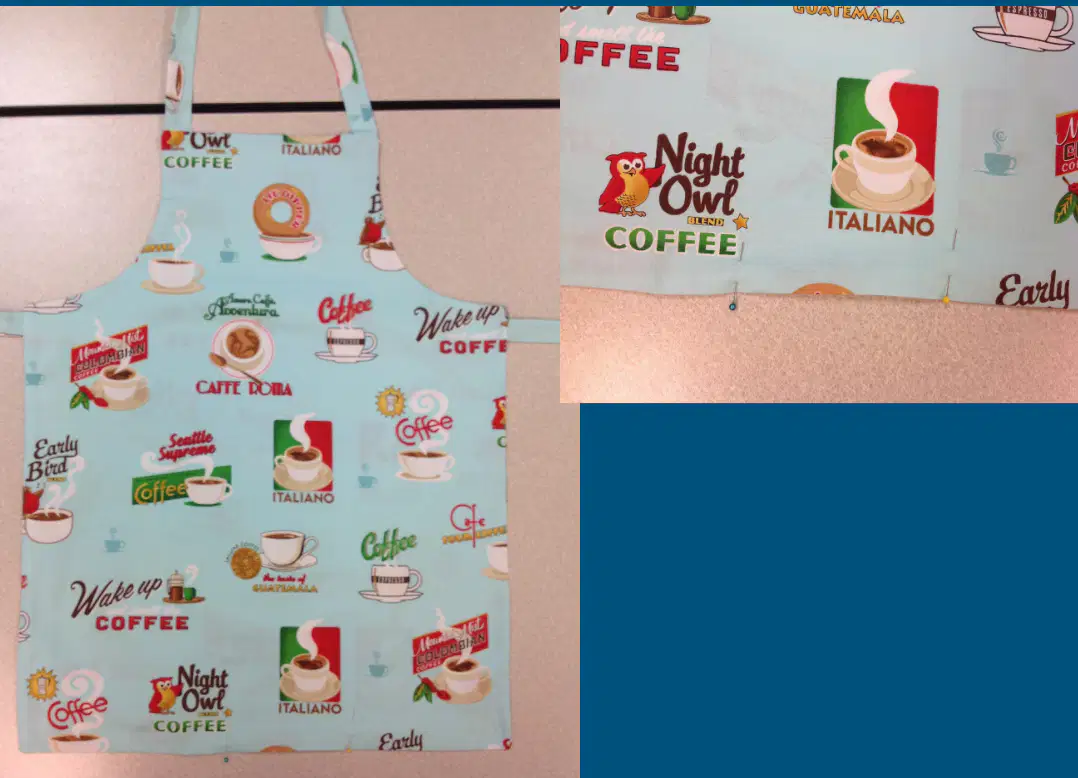
After flipping the fabric right side out, what is the next step?
Press the fabric
Cut the fabric
Sew the fabric
Fold the fabric
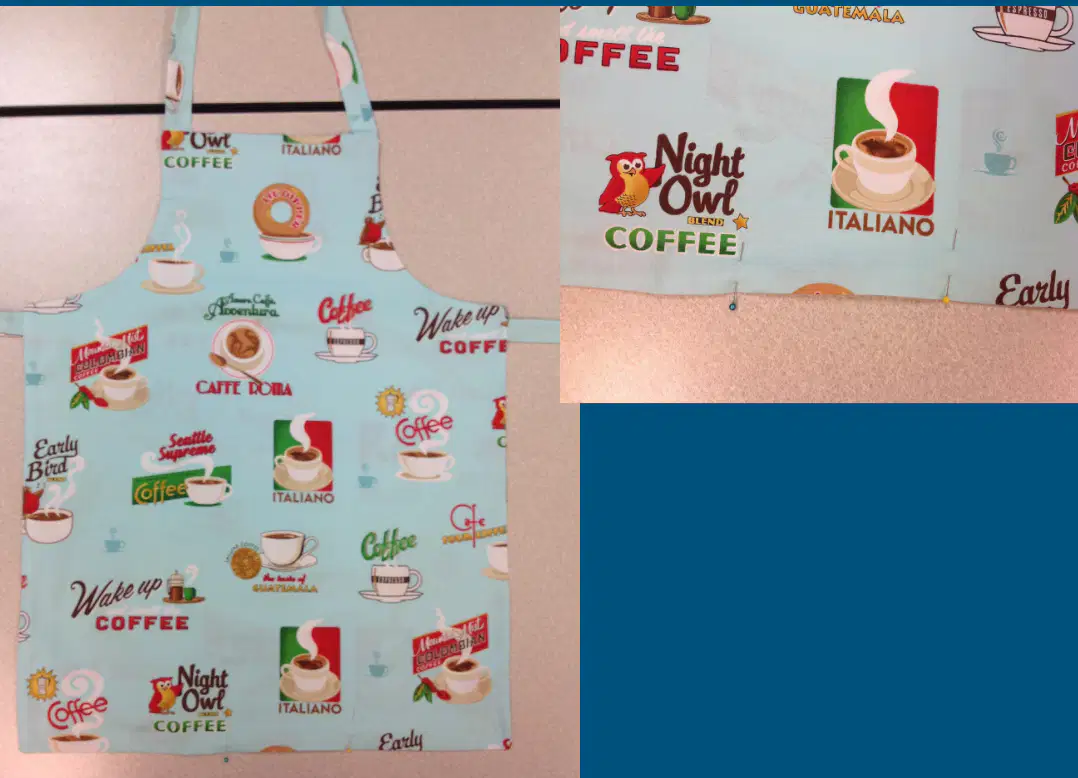
Which of the following is NOT a step after flipping the fabric right side out?
Make sure corners are square
Pin the opening
Press the fabric
Add buttons
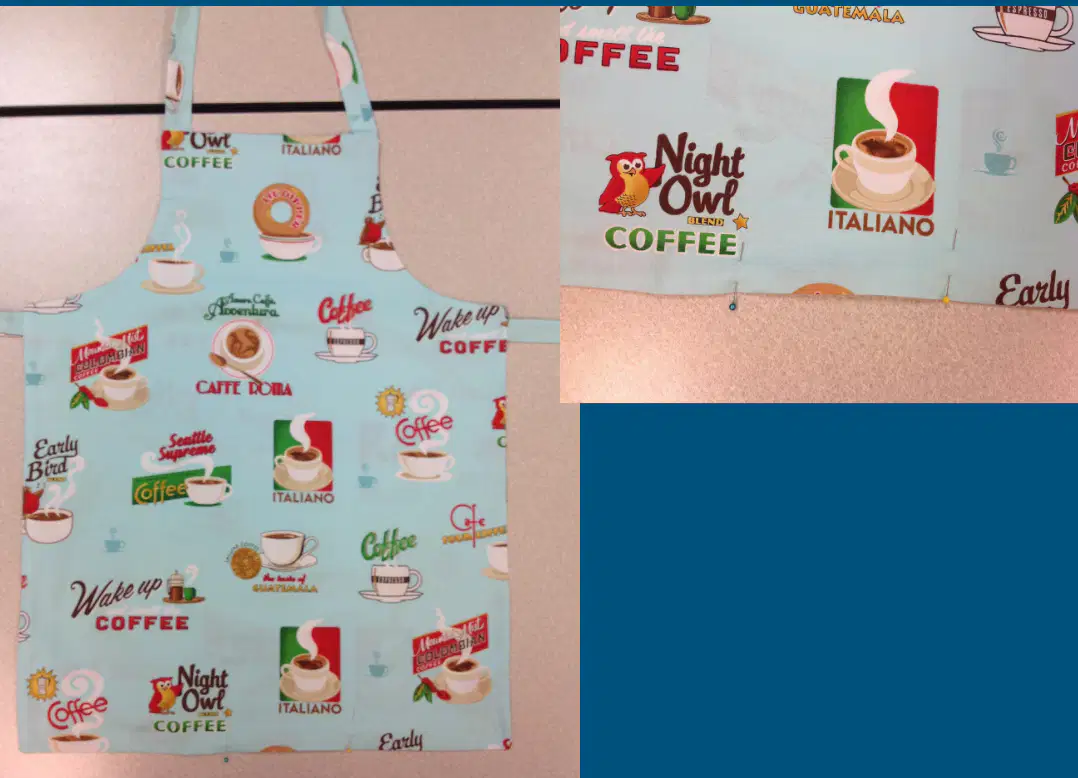
Why is it important to pin the opening after flipping the fabric right side out?
To keep the opening closed for the next step
To make the fabric look colorful
To make the fabric softer
To add decoration
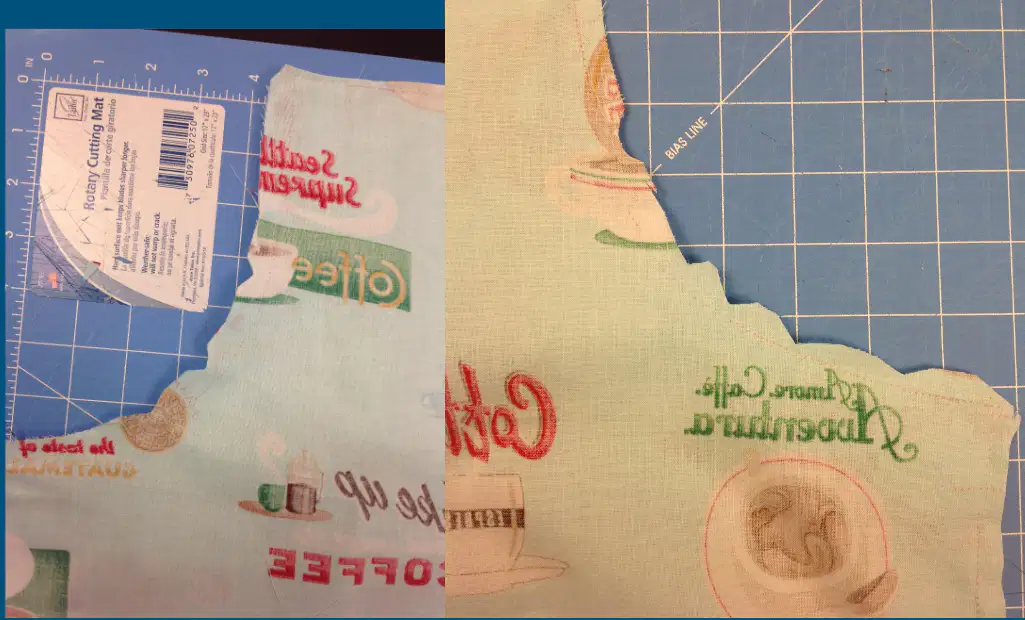
What is the first step in the trimming process according to the instructions?
Notch corners and curves
Trim all the way around (not too close to stitching)
Sew the fabric pieces together
Iron the fabric flat
Why is it important not to trim too close to the stitching when trimming fabric?
It makes the fabric look better
It prevents the stitching from coming undone
It saves time
It helps the fabric dry faster

