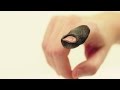
Orthosis Creation and Application Steps
Interactive Video
•
Science, Life Skills, Health
•
7th - 12th Grade
•
Practice Problem
•
Hard

Sophia Harris
FREE Resource
Read more
5 questions
Show all answers
1.
MULTIPLE CHOICE QUESTION
30 sec • 1 pt
What is the first step in creating an orthosis for a mallet finger?
Folding the material in half widthwise
Securing the orthosis with tape
Placing the material on the palmar side
Cutting the material to size
2.
MULTIPLE CHOICE QUESTION
30 sec • 1 pt
Where should the orthosis material be placed initially?
On the palmar side of the finger
On the dorsal side of the finger
Around the wrist
On the nail bed
3.
MULTIPLE CHOICE QUESTION
30 sec • 1 pt
During the cooling process, what must be maintained?
The PIP joint in flexion
The PIP joint in hyperextension
The DIP joint in hyperextension
The DIP joint in flexion
4.
MULTIPLE CHOICE QUESTION
30 sec • 1 pt
What should be done after the orthosis has cooled down?
Apply heat to reshape
Round the edges and cut excess material
Wrap it with additional material
Remove and discard the orthosis
5.
MULTIPLE CHOICE QUESTION
30 sec • 1 pt
How is the orthosis finally secured onto the finger?
With a rubber band
With a string
With self-adhesive tape
With a metal clip
Access all questions and much more by creating a free account
Create resources
Host any resource
Get auto-graded reports
Continue with Google

Continue with Email
Continue with Classlink
Continue with Clever
or continue with
Microsoft
%20(1).png)
Apple
Others
Already have an account?
